This post may contain affiliate links. Please see our disclosure policy.

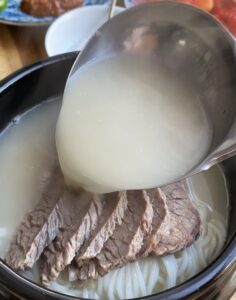
Seolleongtang is a milky beef bone soup, made by boiling ox bones for several hours. It is a staple in Korean cuisine, although it is not usually made at home.
Back in the 90’s, my family owned & operated a very successful seolleongtang restaurant in Ktown, Los Angeles. Good seolleongtang takes HOURS to make, which is why it is usually not made at home (unless in very large batches). It is a dish that families typically go to a restaurant to eat.
What kind of bones to use
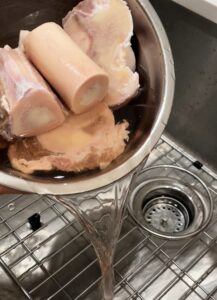
Seolleongtang is made using ox bones, specifically marrow (사골), foot (우족), and/or knuckle bones (도가니). You can usually find these grouped together for sale at a Korean supermarket, but sometimes you can only find them separately. I use a combination of marrow and knuckle bones for my seolleongtang.
If you want to be really thorough, look for bones that are white in the center and white/pinkish on the outside. Avoid using bones that have too many brown or yellow spots.

How to make seolleongtang
Be prepared to wake up early and spend an entire day making the broth. I’ve tested the length of time required to make good broth, and I would say it takes at least 18 hours.
The good news is that there aren’t really any set rules for measurements. A few pounds of ox bones and water is all you really need, and I tried my best to simplify the boiling steps. The first boil is a parboil, and the remaining three boils are the batches of broth being made.
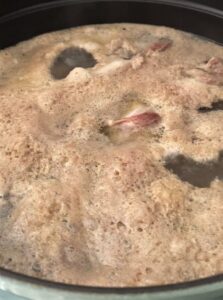
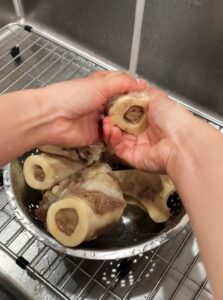
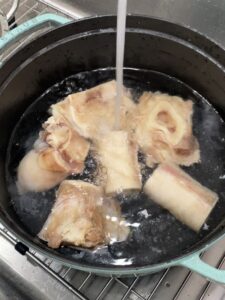
- The first boil is a parboil- this step only takes about 10 minutes and its purpose is to boil off any scum from the bones. After 10 minutes, drain and rinse the bones under cold water to remove all the scum. Do not skip this step, it is really important to have a clean broth for this dish.
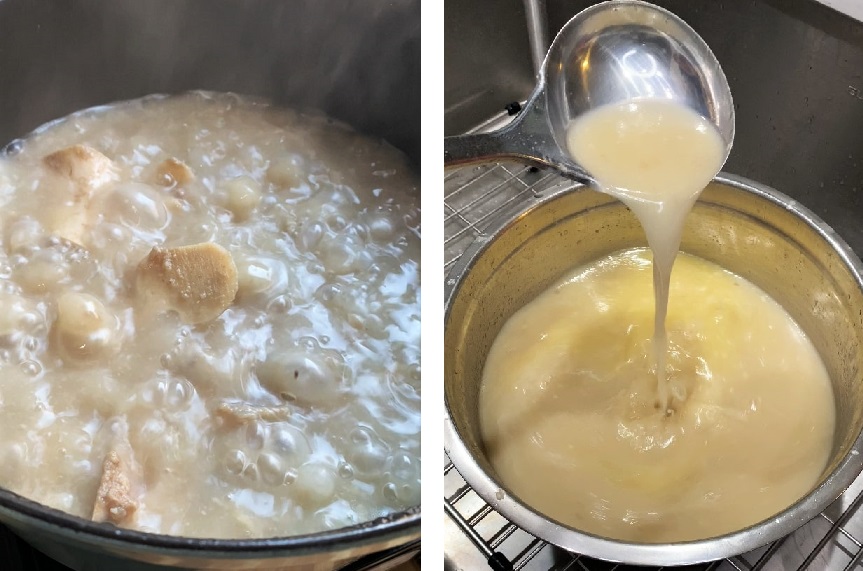
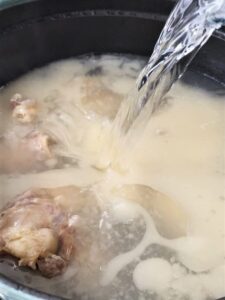
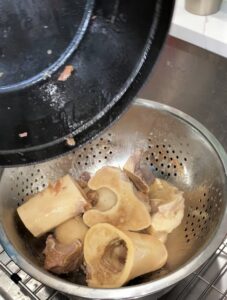
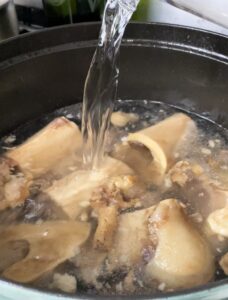
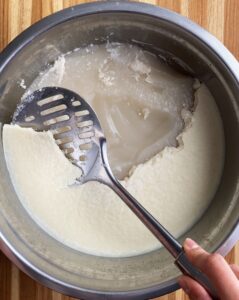
- The second boil (first batch) takes 6 hours. Clean the pot after draining the parboiled bones. Add the cleaned bones back into the pot and cover with water on medium heat. During this time, you’ll need to keep an eye on the water level because it will evaporate over time. Just make sure to keep adding water as needed- enough to sufficiently cover all the bones. After 6 hours, you will have a milky white broth that needs to be drained into a bowl.
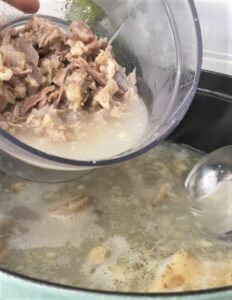
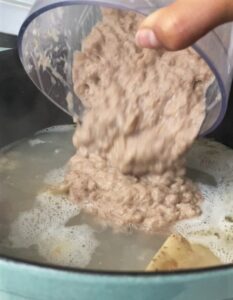
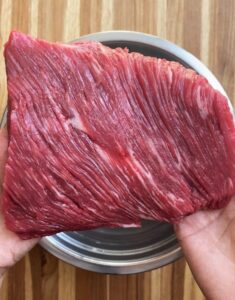
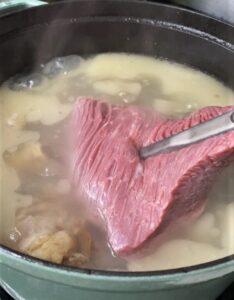
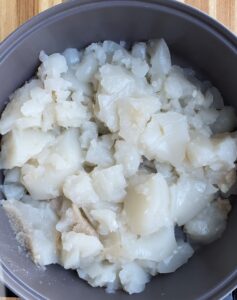
- The third boil (second batch) has the most steps- after the second boil, remove all the meat from the bones and blend it with a ladle of the broth. Put the bones back into the pot and cover with water. Then add the blended meat into the pot, and cover again for another 6 hours. At the 2 hour mark, soak some brisket in cold water for 1 hour. Drain, then add the brisket into the pot for the remaining 3 hours of the boil. Add water as needed. Then remove the brisket and set it aside to cool down completely before putting it in the refrigerator. Strain the broth into the first batch of broth we made, then set it aside. This batch of broth will be even milkier than the first one.
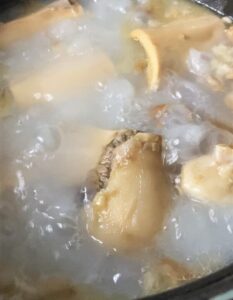
- Third batch– Repeat step 2. You can skip this boil if you want to, but I highly recommend doing it. The broth for this boil will be a bright white color and not as creamy as the other ones. Be careful not to add too much water at this point.
The goal is to end up with a milky, thick broth that is rich in nutrients from the bones. If your broth isn’t turning white, it could be because your heat is too low. Each batch needs to be at a medium boil, not a simmer. There will be a slightly yellowish color to the broth when it’s all done boiling- that’s just fat and is going to be removed after solidifying in the fridge.
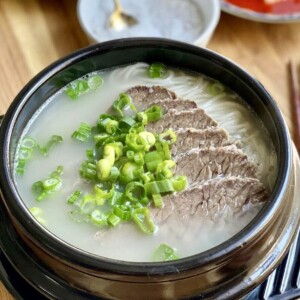
How to serve seolleongtang
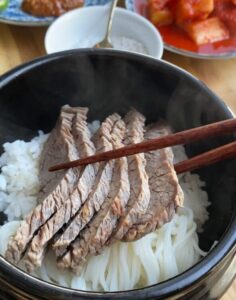
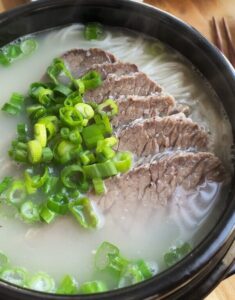
You will typically see seolleongtang served with rice, noodles, or both. Toppings include green onions, salt & pepper for seasoning, and kkakdugi (radish kimchi). The salt is VERY important. Notice that the broth is not seasoned at all. It is done at the table to your liking. I add about half a teaspoon of salt to my broth. Sometimes there is a chili paste that can be added too, but I prefer to use the gukmul (juice) from the kkakdugi. And we can’t forget the tender slices of brisket.
I also like to have some Korean peppers and ssamjang on the side. This combo is the ultimate Korean comfort meal!
Pro Tip
Save your leftover broth! You can freeze the broth for later use, and there are tons of other dishes you can use it for.
One of my FAVORITE ways to utilize the broth is for making restaurant quality, bomb ass kkakdugi kimchi. Yes, one of the secret ingredients to fire kkakdugi is ox bone broth!

Seolleongtang (Ox Bone Soup)
Ingredients
- 4 lbs ox marrow & knuckle bones
- 1-2 lbs brisket
For serving:
- salt & pepper
- chopped green onions
- somyeon noodles
- rice
Instructions
- Soak the ox bones in water over night in the refrigerator. This is to remove as much blood as possible from the bones.

- After draining, put the bones in a large stock pot and cover them with water. Bring to a boil. You will see scum floating to the surface. After 10 minutes of par boiling, remove from heat and drain completely.

- Wash the bones thoroughly so that there is no more scum left.
- Clean the pot and add the bones back in. Cover with water, then bring it to a medium boil (covered) for 6 hours.

- Check on the water level from time to time during these 6 hours. You will need to add more water as it evaporates. After a few hours, the broth should be a nice milky color.
- After 6 hours, remove from heat and strain the broth into a large bowl. Set it aside to cool down completely before storing it in the refrigerator.

- Remove the meat on the bones and set it aside. Put the bones back into the stock pot and cover with water again.

- Put the meat into a blender with a little of the stockpot water. Blend until smooth.

- Bring to a medium boil, add the blended meat, and cover for another 6 hours.

- At the 2 hour mark, soak the brisket in cold water for 1 hour.

- After 1 hour, add the brisket to the stock pot for the remaining three hours.

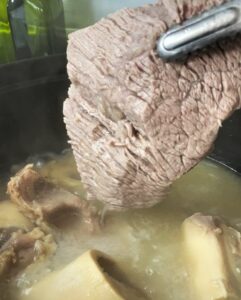
- When the 6 hours are up, remove the brisket and set it aside to cool down completely before storing it in the fridge for later.

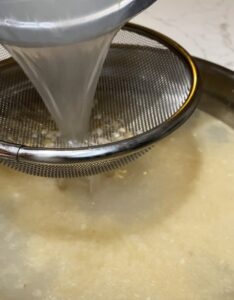
- Drain the broth into the large bowl of broth from before. Make sure to use a fine strainer since this batch will have blended meat chunks. Let it cool completely before putting it back in the fridge.
- Put the bones back into the pot and cover with water again. Boil covered on medium heat for another 6 hours, adding water as needed (this time not too much). You may skip this boil or shorten the time if you want to. I recommend not skipping it. You can throw away the bones after this.
- Drain the broth once more, let it cool down, and put it back in the refrigerator until the fat solidifies at the top.
- Remove the layer of fat at the top and discard it.

- Reheat the amount you will use of the gelatinous broth. You can store the rest in the freezer for later use.

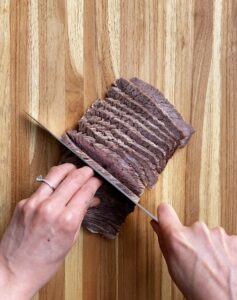
- While the broth is boiling, thinly slice the brisket. The thinner the better!
- To assemble a bowl, add some cooked rice and somyeon noodles. Put the brisket slices on top.

- Ladle over some broth
- Season with salt and pepper to taste, then add chopped green onions
Nutrition information is automatically calculated, so should only be used as an approximation.


To anyone reading this: use a spice bag for the blended cartilage/meat/fat! Otherwise you might scorch the bottom on the third boil and end up with a burnt taste.
This recipe is amazing, I no longer need to go to ktown for my favorite soup. Thank you so much!
Quick question: is there a difference between starting with much more water than just covering the bones, when it will eventually boil down anyway? Asking because I’m currently making this and accidentally added too much water in my second 6 hour boil, but it boiled down to the correct amount anyway. I’m hoping it still turns out good, but wanted to know since this could also make the process a little easier if I don’t need to constantly check on the water level. Thanks!
Hello Sky!
So there is a difference between starting with a very large amount of water vs. adding it gradually, and the latter is recommended to have more control over gelatin extraction and flavor. You can definitely dilute the flavor if too much water is used. Adding water gradually helps to maintain a more consistent intensity of the broth, so I would not recommend adding too much between each boil for the sake of effort, if you can avoid it!
Thank you for the very clear instructions & pictures.
Thank you for the very clear instructions!
I’m going to make this tomorrow. Can I do each boil once a day until it’s done? Or does it have to take place over 2 days?
Also, how do I freeze the meat? In the soup? Or can I vacuum seal?
And can I add radish? If so, can I boil it at the end? Thank you!
This is my favorite soup dish! I’ve always been a huge fan of the milky broth from the ox tail! Thank you so much for sharing your tips on getting that clean broth and getting rid of the fat! I’m new to cooking, but it has been very helpful following your pictures and steps! Thank you so much! It was delicious and my husband loved it as well.
Don’t sleep on this recipe! My absolute #1 favorite soup. Highly underrated. The white broth may not look like much, but the rich, bold flavors are 100% worth the long cook time. “It ain’t cooking, if you’re looking.”
Thank you so much for sharing this recipe among so many others! With your help, I am able to impress my Korean wife and in-laws!
My brother and I love trying out complex recipes so as soon as this one was posted, we had to try it out during his next visit! We spent the whole night making it and then found other recipes to use over the rest of his visit to incorporate the broth in. We had so much fun making it and it was so tasty, and it elevated all the dishes we tried it in! Thanks for sharing it, Stella!!
This is my favorite recipe and one of the first recipes I’ve tried. It’s a versatile dish that I use as a base for some jigaes. This recipe has become a staple in my kitchen, delivering consistently excellent results.
i was never the one to make long time consuming recipes, but when i saw this recipe (and how much jangmojip sullungtang is now), I knew I had to make my own. ive made it four times now, and I love having it on hand in the freezer. thank you so much!!! I appreciate your recipes so much
Delicious recipe!! I love trying new recipes. Made this for me and my bf.
Turned out amazing.
Ok, so I think I finally got it! I see your posts on instagram and follow that recipe but for this I had never clicked on the link nor had I read everything on your blog. Thank you so much for being so specific on every step and extra steps to make it even better. Now I am confident I can make it for my family! My father in law usually makes it for us so I am excited to make it myself. Again thanks so much for sharing your awesome recipes!!
I’m making this for the second time and I’m always so appreciative of your recipe details! Thank you again for posting this. When I made it the first time, the broth was so clean and delicious. My friends who got to try it loved it.
I haven’t made this yet but your recipes are always bomb 🙂
thank you so much ??