This post may contain affiliate links. I only recommend products or services that I personally use or trust, promise!
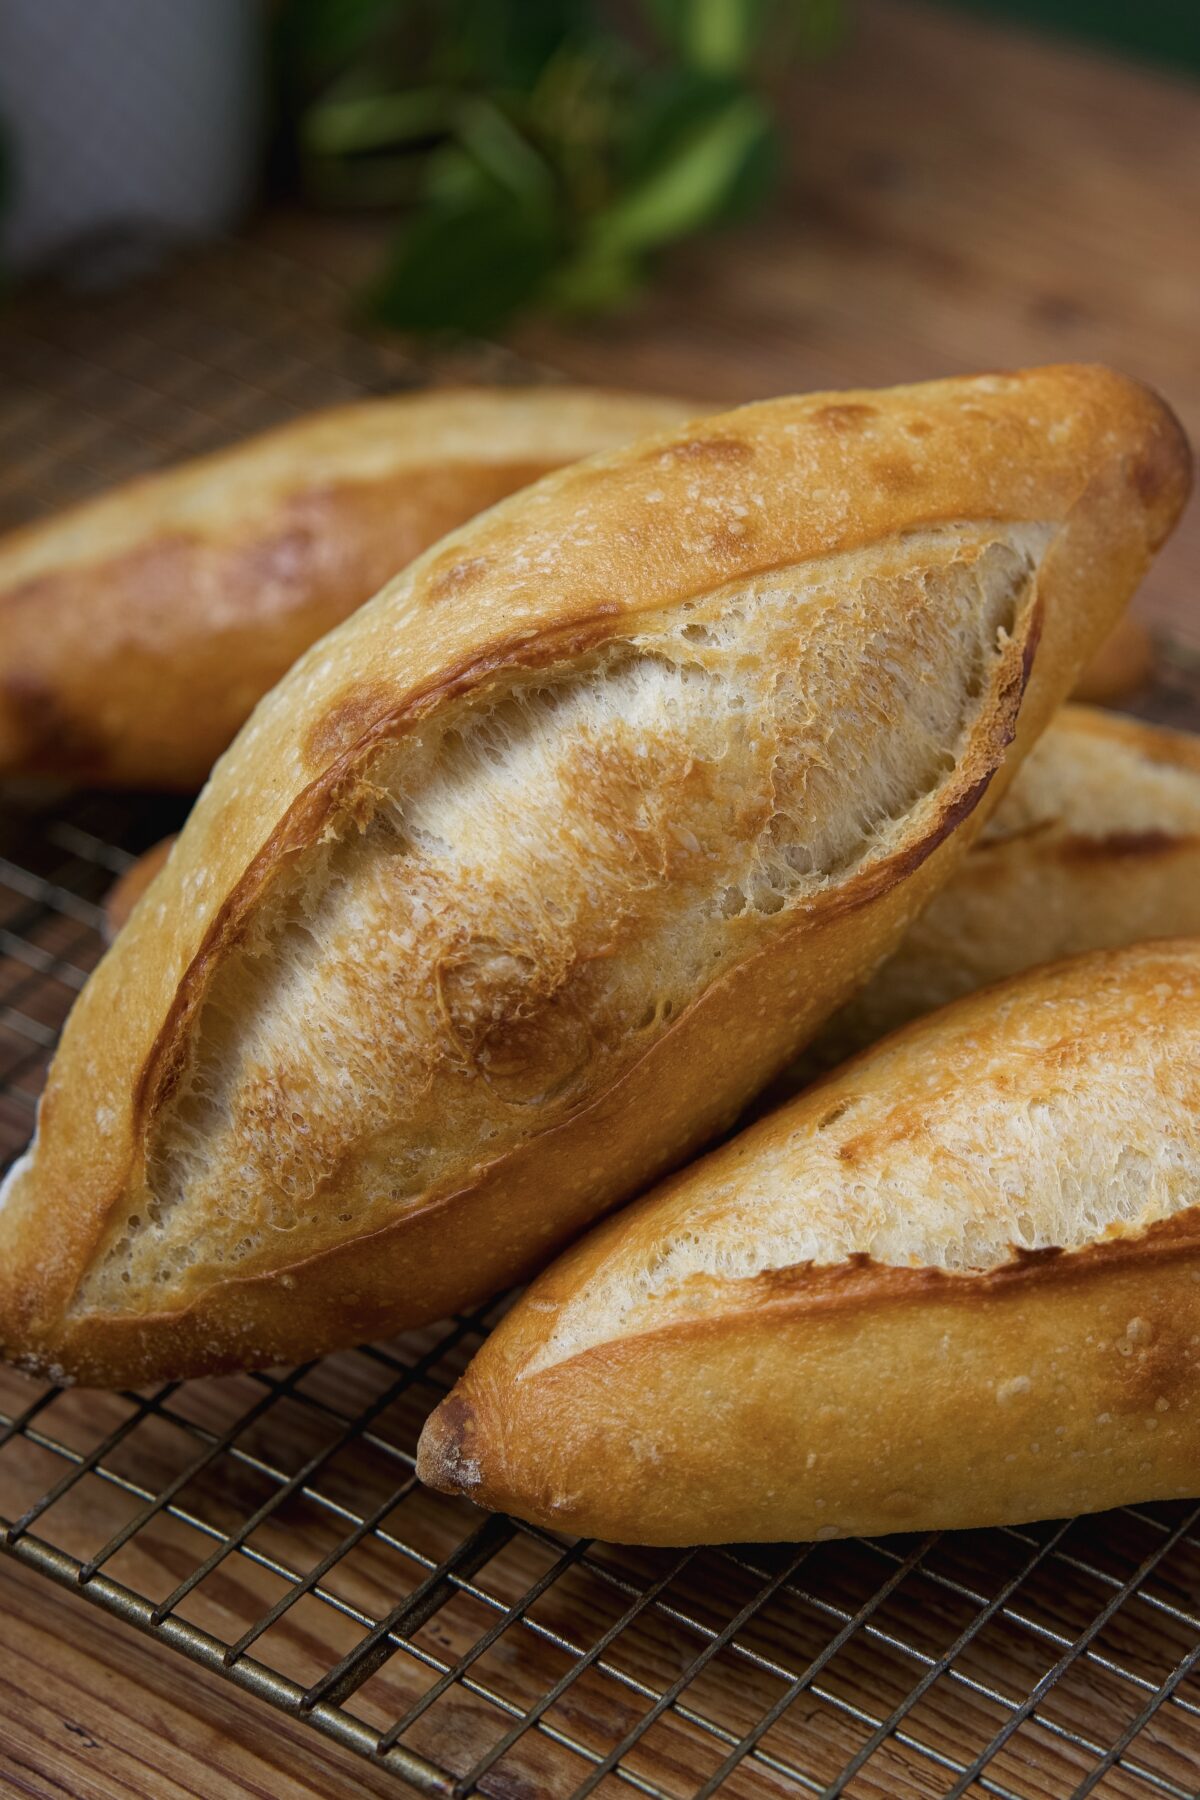
This birote salado recipe has been THREE YEARS in the making and I am so excited to share it with you!
Of every recipe I have published, I am most proud of this one. It holds a lot of sentimental value to me, because I learned how to make it just for my dad. Since I was a young girl, he has ALWAYS complained that you can’t find good birotes in the US. My dad was born in Guadalajara and tells me all the time how much he misses birotes, so I took it upon myself to learn how to make them!
Why You’ll Love This Recipe
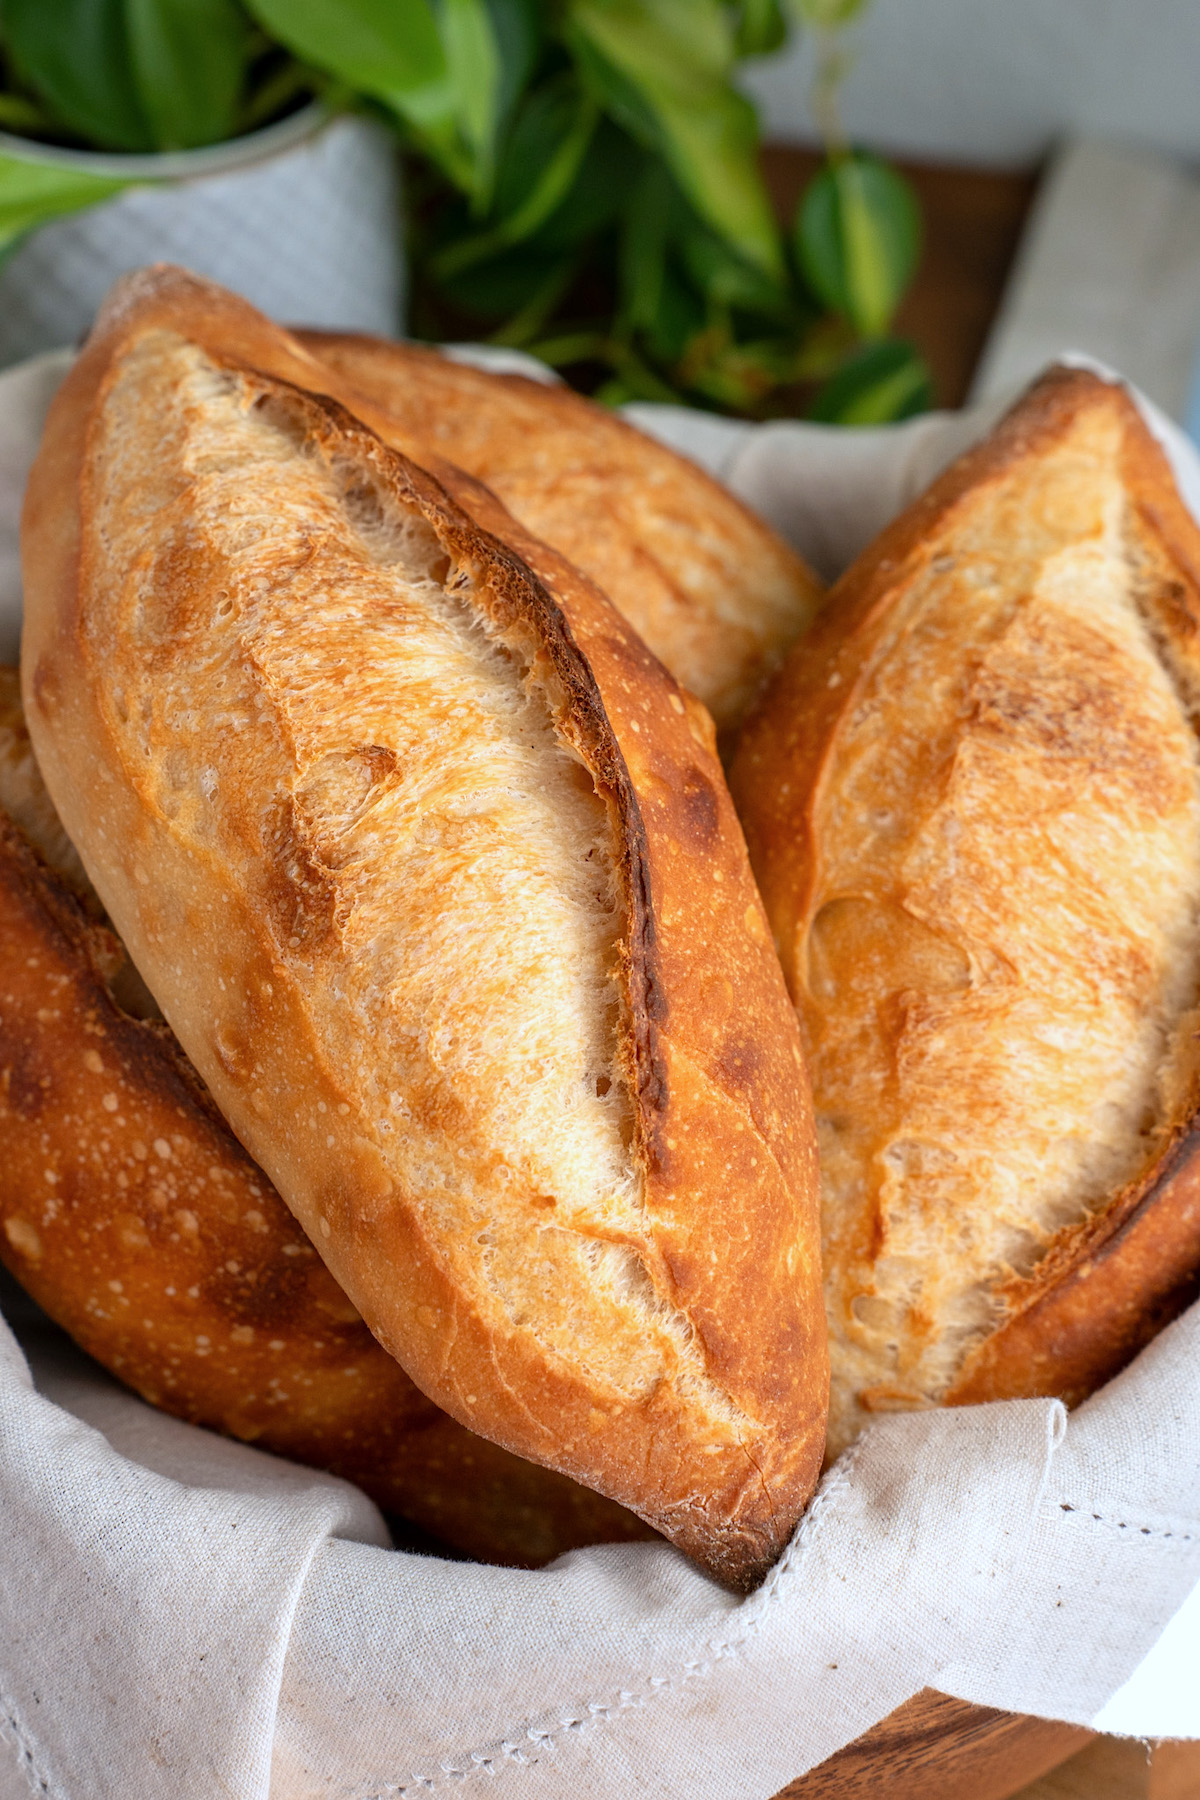
If you’re like my dad and just want some decent birotes reminiscent of the delicious crusty rolls you can get in Guadalajara, you’ve come to the right place. These are as good as it gets when it comes to birote salado! Here’s why-
- A lot of thought and care went into developing this recipe. It took me 3 years to get here because I needed to harness sourdough first, including making & maintaining a strong and healthy sourdough starter.
- It is difficult to find birotes salados, even in areas that have large Mexican communities.
- There are step-by-step photos for EVERY part of the process to ensure you don’t mess it up!
- My father was my taste tester for every single recipe batch I developed. Every time I thought I got it right, he was truthful and told me it wasn’t there yet. That is until this batch! I finally got his stamp of approval, along with my Abuela and Tio. Now they all ask me to make birotes for them any time I see them!
Disclaimer: you can have all the right ingredients, measurements, techniques and instructions on how to make birotes exactly as they are made in Guadalajara, but they cannot be 100% replicated. This is because the microbiome, elevation, water and climate are significant variables. I have done the best I can to recreate them as closely as possible, but please keep in mind that they will not be exactly the same!
What is Birote Salado?
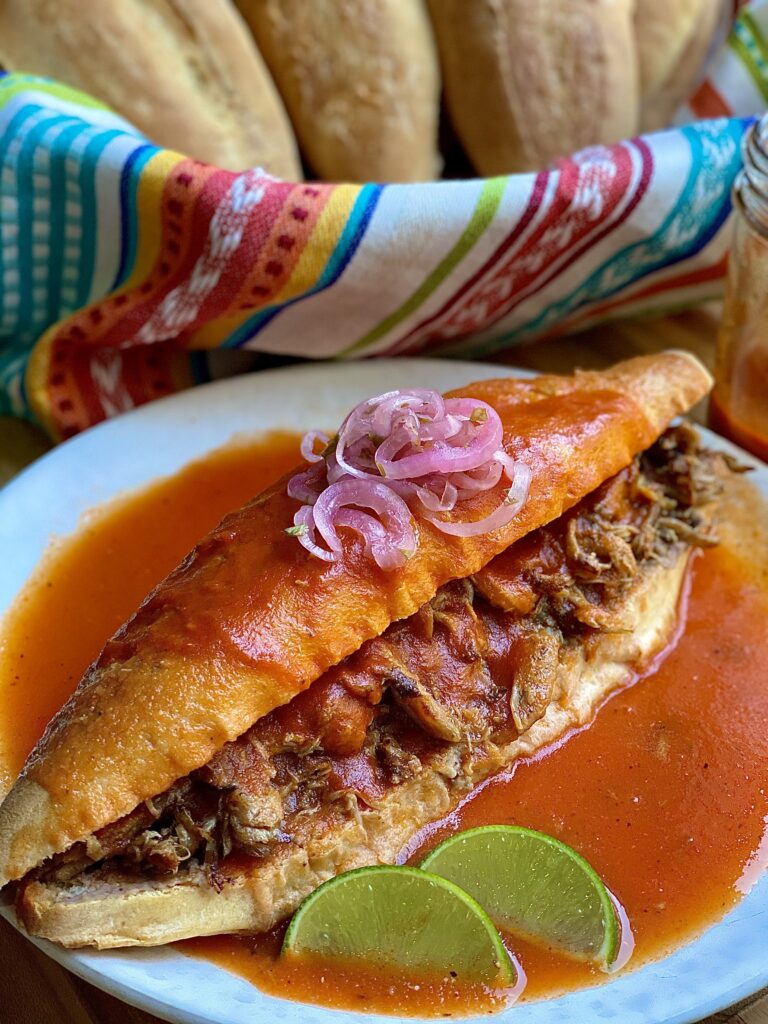
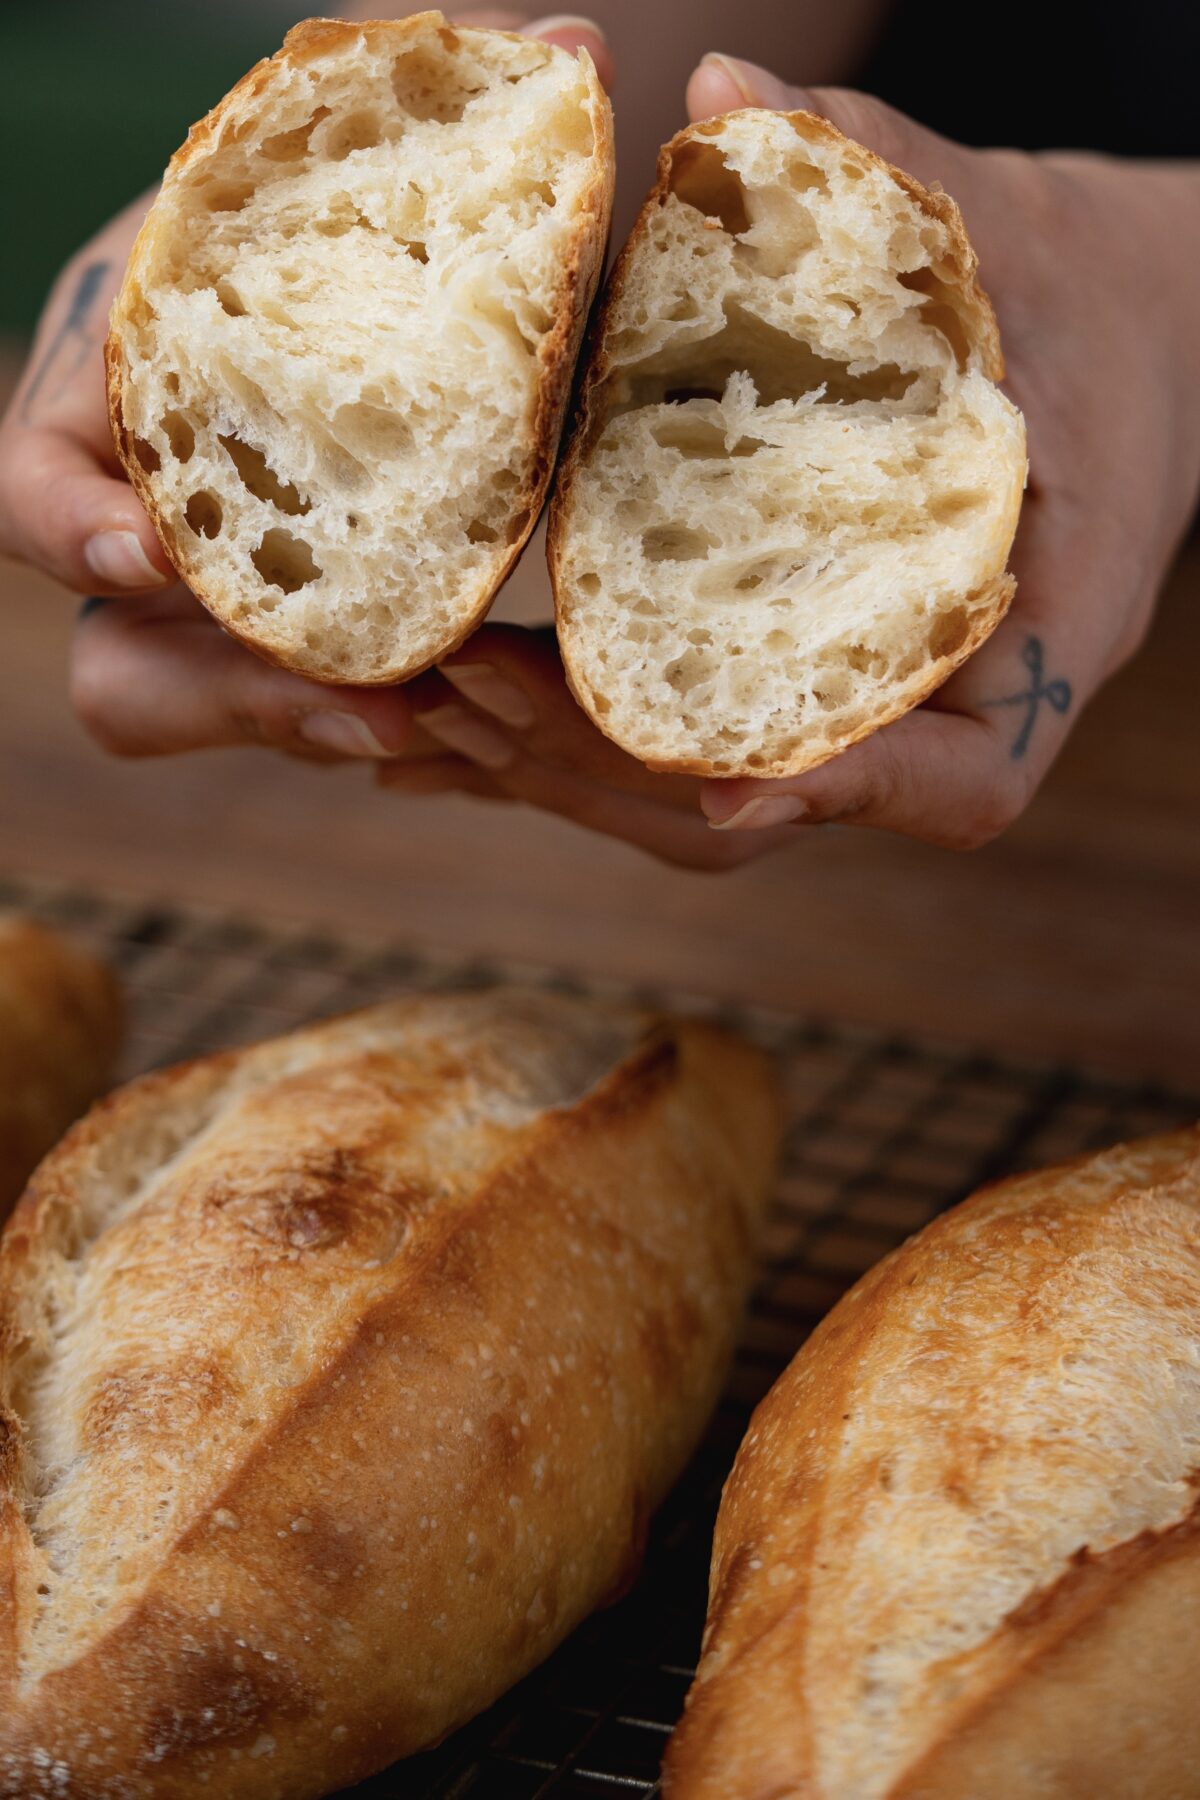
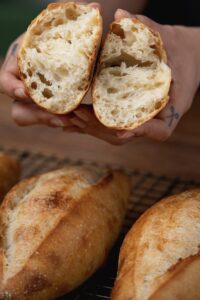
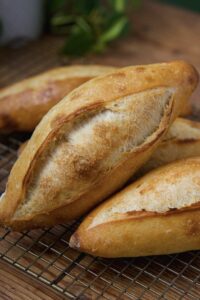
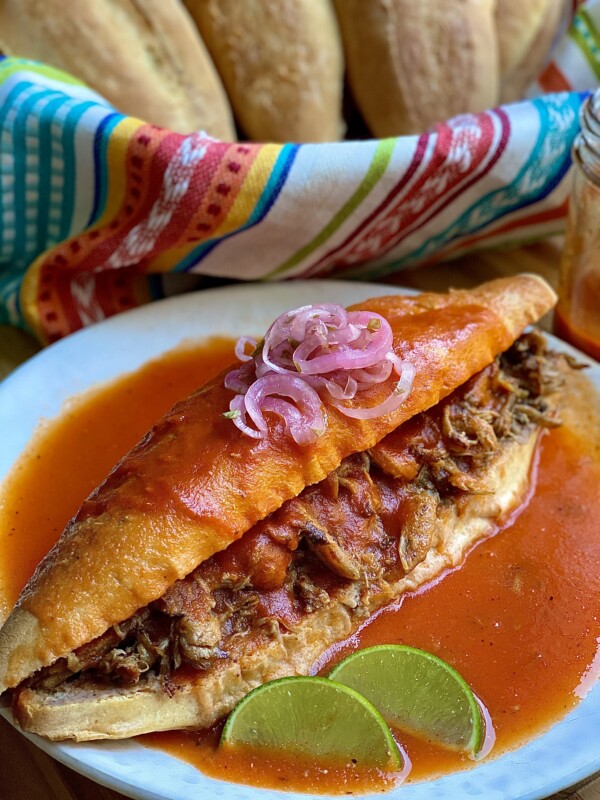
Birote salado is a traditional and unique Mexican sourdough bread, originating from Guadalajara, Jalisco, where my family is from! It’s known for its distinctive crusty exterior and soft, fluffy interior. This bread is used for Tortas Ahogadas, a famous regional dish from Guadalajara (one of my all-time favorite dishes).
Many people would say that birotes are the Mexican version of a French sourdough baguette. It is made with wild yeast (sourdough starter) and rolled into a similar shape as a baguette, but shorter. Its unique texture and flavor are what set it apart from other breads! The sourdough starter is refreshed with lime juice, egg, beer, sugar, and a little salt. This is a pretty significant departure from how sourdough bread is traditionally made, which is why this beloved bread is so unique.
The History of Birote Salado
One thing that is known for sure, is that the history of birote salado dates back to the 19th century in Guadalajara, Jalisco. Its exact history in terms of who created it and why it’s called “birote” seems to be uncertain, but it is generally accepted that birotes are based on French recipes for baguettes.
Most of my research suggests that a Belgian volunteer in the French army named Camille Pirotte created birotes, while trying to teach the people of Guadalajara how to make French bread. He couldn’t find yeast, but the warm climate allowed him to make sourdough, resulting in what was originally called ‘pan de birote.’
None of this can be definitively confirmed, but I can totally see this being accurate because the word “birote” sounds very similar to the last name “Pirotte.” You can read more about this version of the origin of birotes here.
If you want to see how birotes are made in Mexican bakeries today, I recommend watching this YouTube video. It also shares a bit about its history. I watched it a million times trying to figure out how to make them, and my recipe is based off everything I was able to observe.
Ingredients for Birote Salado
– For the levain:
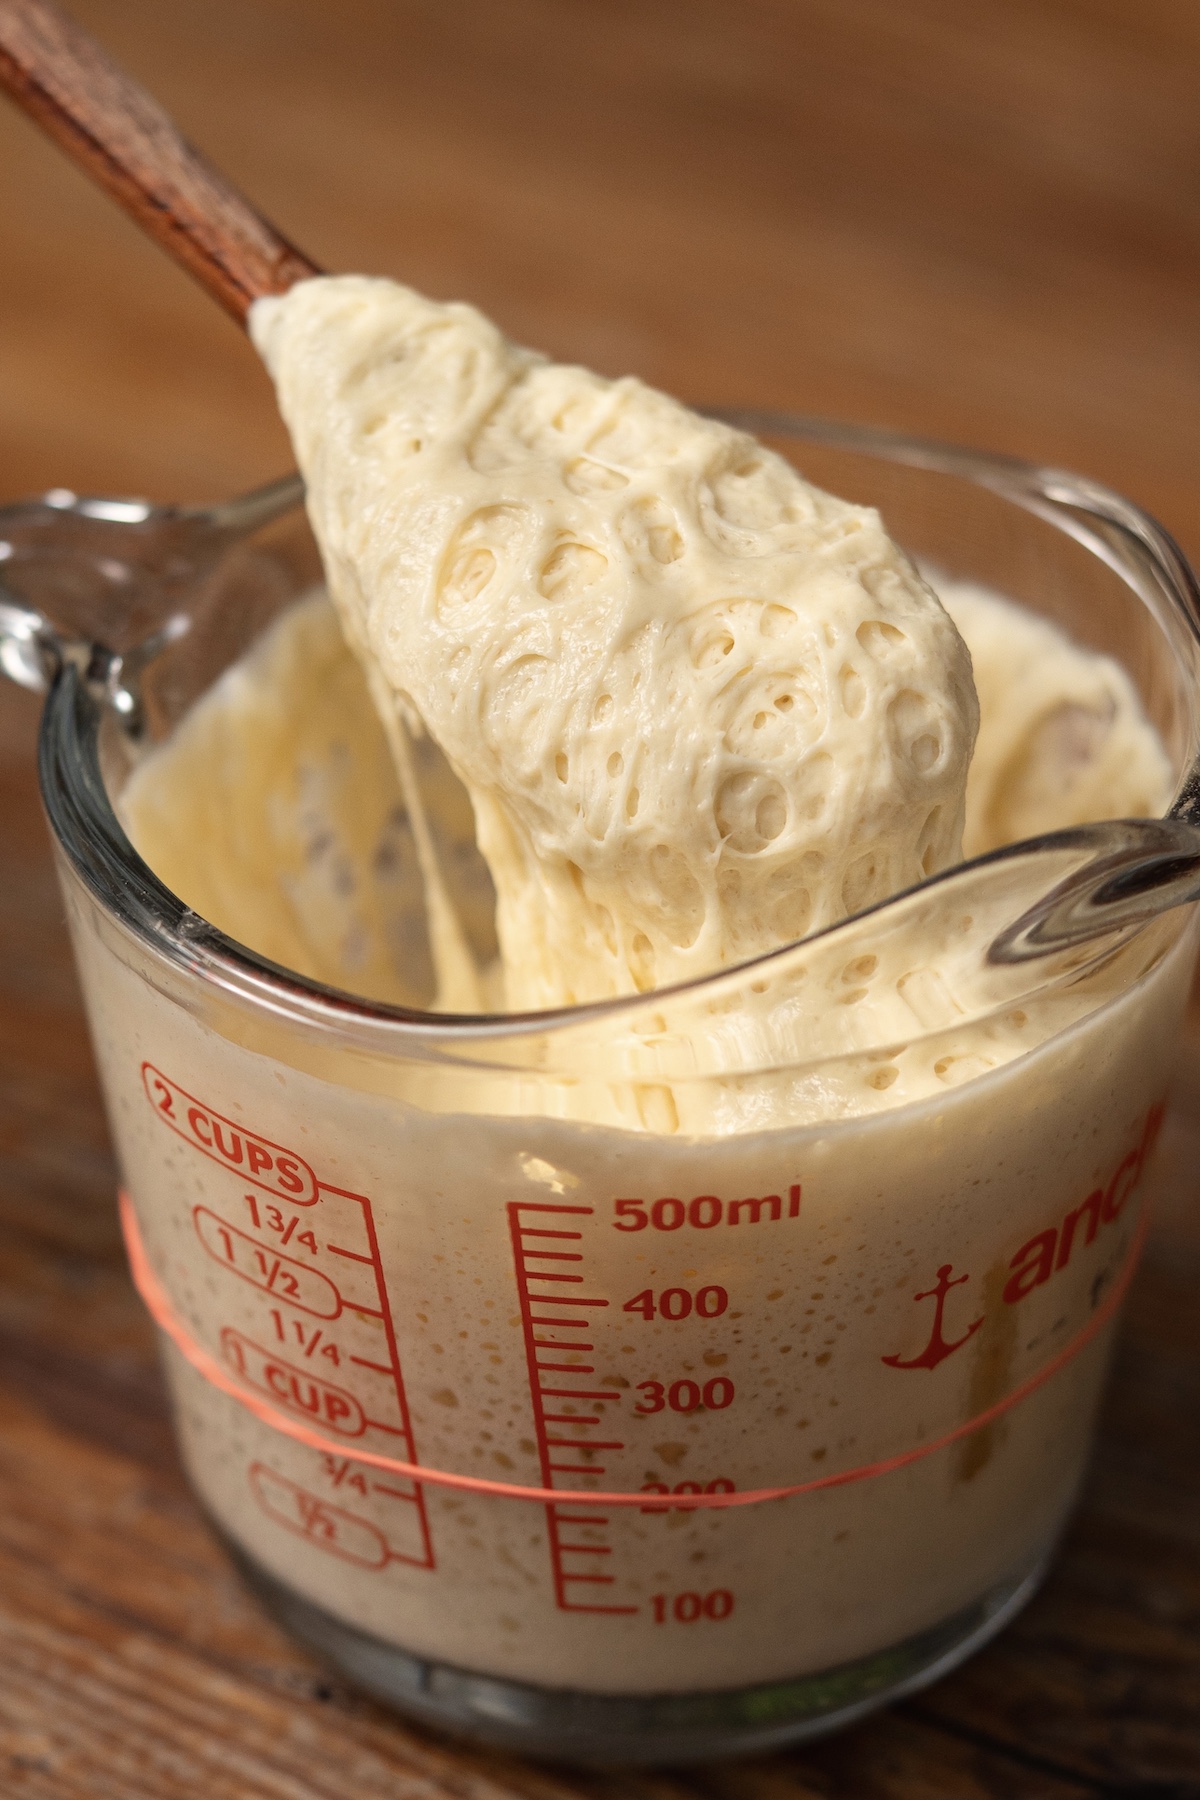
- Sourdough starter- you will need an established sourdough starter to make this recipe. To make the levain, make sure your sourdough starter has already peaked and is starting to fall back down.
- Beer- use any Mexican lager. Beer adds flavor complexity, and the carbonation introduces extra gas, creating a lighter & airier crumb.
- Lime- a little lime juice helps give the birotes their signature sour flavor. It also aids in the fermentation process, encouraging growth of good bacteria while limiting excessive yeast activity, which balances the flavors. Lime juice can also aid in enhancing the shelf life.
- Egg- improves structure, enriches the dough, and helps to achieve a nice golden color to the crust.
- Sugar- sugar provides a fermentation boost, acting as a food source for the yeast. It also helps to balance the flavors of this salty bread, but it will not make it sweet.
- Salt- I’m not 100% sure, but I believe salt was originally added to the levain to slow down the fermentation process since the climate was so warm. For tradition purposes, I am keeping the salt but adding only a tiny bit here.
- Flour- I use Kirkland Organic AP Flour
– For the final dough:
- All of the above levain
- Flour- I’ve tried making it with both all-purpose flour (Kirkland Organic AP Flour) and bread flour (King Arthur Bread Flour). Either one will work fine, or even a 50/50 mix of the two, but I preferred batches made with bread flour and so did my family.
- Water- I only use RO water (reverse osmosis water) for sourdough baking, not because it is the best but because it’s what I have that works for me. Refrain from using tap water as it might have minerals that prevent proper fermentation. Spring water is probably the best option if you don’t have RO water.
Summary of Hydration:
Most people don’t really need to know any of this, but if you’re a sourdough baker I figured you might be curious about the hydration levels so here they are:
- Sourdough starter: 100%
- Levain: 93.75%
- Final dough: 76.4%
Before you start making this recipe
I would like to preface this by saying that this is not a beginner recipe. There is a reason it took me such a long time to develop this recipe- it was hard af! The difficulty of this recipe is 2-fold:
- You should have a good understanding of sourdough already, especially the bulk fermentation process. This is what took me the longest to harness, and it takes a lot of hands-on practice! I wrote the recipe with beginners in mind, so I hope it is easy to follow regardless of difficulty level.
- The baking process is a little complicated, but necessary for a good oven-spring and pronounced belly/ear. I struggled a lot with this part because I just couldn’t get my birotes to open up. It requires a lot of extra work, but I literally tried EVERYTHING before getting to this solution!
The ambient temperature and the temperature of my dough for this recipe are around 78°F. I have provided times throughout the recipe as a guideline to help beginners based on this temperature. You can use time as a rough guideline for the completion of bulk fermentation, but it’s not a reliable indicator on its own.
Setting Up Your Oven
I would say that the hardest part of this recipe is nailing the bulk fermentation process, but not far behind, is the oven situation…especially if you have a gas range oven!
I have provided special instructions for how to set up your gas oven in the recipe card. If you have an electric oven, it might be much easier for you to bake normally instead of using the “oven off” method. More on this in the recipe card!
Tortas Ahogadas
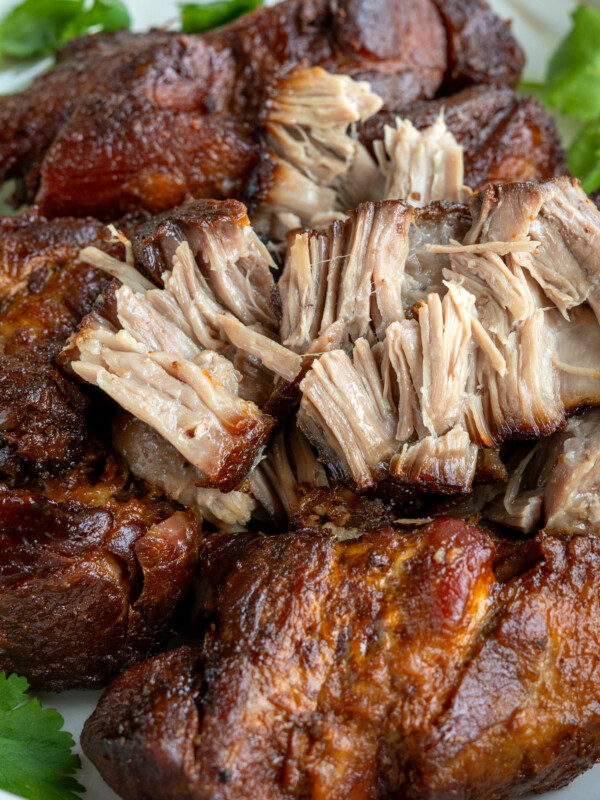
Did you search for this recipe in hopes to make Tortas Ahogadas? This is one of my all-time FAVORITE Mexican dishes. I have all the recipes you need to make it below!
Birote Salado (Mexican Sourdough Bread)
Ingredients
Wake up feed (if needed)
- 20 g sourdough starter
- 40 g all-purpose flour, Kirkland Organic AP Flour
- 40 g water
Levain
- 80 g sourdough starter, just passed its peak
- 80 g all-purpose flour, Kirkland Organic AP Flour
- 40 g Mexican lager beer
- 30 g egg, whisked, about half an egg
- 10 g lime juice
- 8 g sugar
- 1 g salt
Final Dough
- all of the above levain, about 250 g
- 400 g King Arthur Bread Flour, or Kirkland Organic AP Flour
- 285 g water
- 10 g salt
Instructions
Wake up feed (if needed)
- You need an active sourdough starter for the levain, so feed your sourdough starter 6-8 hours before building the levain. Begin with 20g of unfed sourdough starter, then add 40g each of water and all-purpose flour. I use Kirkland Organic AP Flour. *You do not need to do a wake up feed if you feed your starter was already recently fed and you have 80 grams of starter you can use. You can skip straight to the next step, even if your starter has passed its peak, and has fallen quite a bit. Just keep in mind that you will need a total of 80 grams of sourdough starter.
Levain
- Add all of the levain ingredients to a measuring glass or jar and mix until fully combined. Make sure you use a jar large enough to allow the levain to double in height. Cover with a damp towel or plastic wrap to keep it from drying out.You have 2 options here: 1. You can wait until it doubles at room temperature (about 4 hours depending on the temperature) if you want to bake the same day.2. After the levain has risen by 50% at room temperature, you can park it in the fridge to continue fermenting at a slower rate, for 12 to 48 hours. The longer, the more tangy the birotes will be.Option #1 allows you to bake quicker, but it won't be as sour/tangy as birotes are described to be. Option #2 is the more accurate way, and also gives you more freedom/control over your baking schedule. It will continue to rise to 100% while in the fridge. If It hasn't by the time you're ready to make your dough, just take it out of the fridge an hour or so beforehand and allow it to rise to 100%.
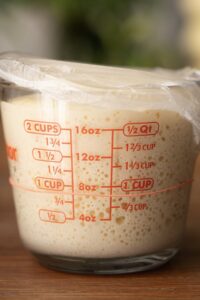
Final dough (begin bulk fermentation)
- Once the levain has doubled in size, scrape all of it into a mixing bowl and mix with 285g water. Then add 400g of flour and combine to form a well hydrated dough, making sure there are no dry spots of flour left. Cover with a damp towel and let it rest for 30 minutes. *To hasten the bulk fermentation process, use warm water. I recommend no warmer than 95 degrees. This can especially help if you are using the levain straight out of the fridge, as it will compensate for the colder temperature.
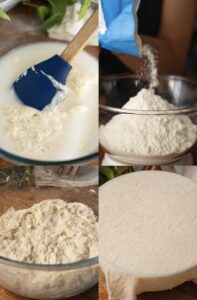
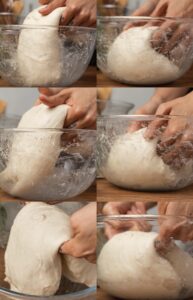
- After 30 minutes, sprinkle half of the salt evenly over the dough, wet your hands, then do 4 stretch and folds. After the 4th stretch and fold, sprinkle the rest of the salt over the dough and repeat stretch and folds until the salt is evenly distributed. Cover and rest for 30 minutes.*How to do stretch and folds: gently slide your hand under one side of the dough, then lift it up and stretch it as far as it comfortably goes without tearing. Fold the stretched piece over the top of the dough, effectively folding it in half. Rotate the bowl a quarter turn, and repeat the stretch and fold on the next side. You’ll stretch and fold each of the four “sides” of the dough (like an envelope fold).
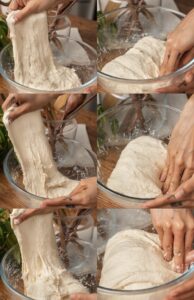
- After 30 minutes, do one set of coil folds with wet hands. Then cover and rest for 30 minutes. *How to do coil folds: Slide your hands under the dough from both sides, supporting it as you gently lift it up from the center. Let the weight of the dough pull it down naturally. Coil or tuck one end of the dough underneath itself, folding it toward the center. Do the same with the other end, folding it over the first fold and creating a “coil” structure in the dough. Rotate the bowl and repeat.
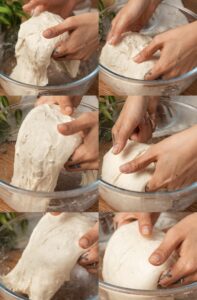
- Do three more sets of coil folds, covering and resting for 30 minutes between each set. By the time you do your last set, the dough should feel and look much more plump, airy, and smooth. Cover and continue to bulk ferment to 75% rise (done in anywhere between 1-3 hours after last coil fold, depending on the temperature).
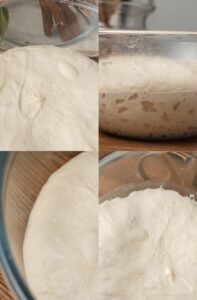
- A more reliable way to check if your bulk fermentation is complete, is to look at the dough. It should have increased in size, by about 75%. There should be bubbles forming at the top, sides, and bottom of the dough. The outer part of the dough touching the sides of the bowl should also be domed, and pull away from the sides easily. It will also jiggle when shaken.
Divide, preshape, & bench rest
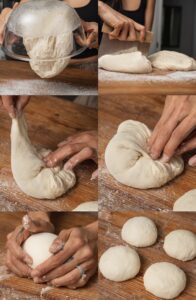
- Lightly flour your work surface and gently turn the dough out from the bowl. Using a bench scraper, divide the dough into 4 or 5 pieces, depending on how big/small you want them. Pull the edges of the dough into the center to create tension, then flip it over seam side down and use the push & pull method to roll into a ball. Cover with a damp towel and rest for 20 minutes.4 rolls = about 235g each5 rolls= about 185g each
Final shape & proof
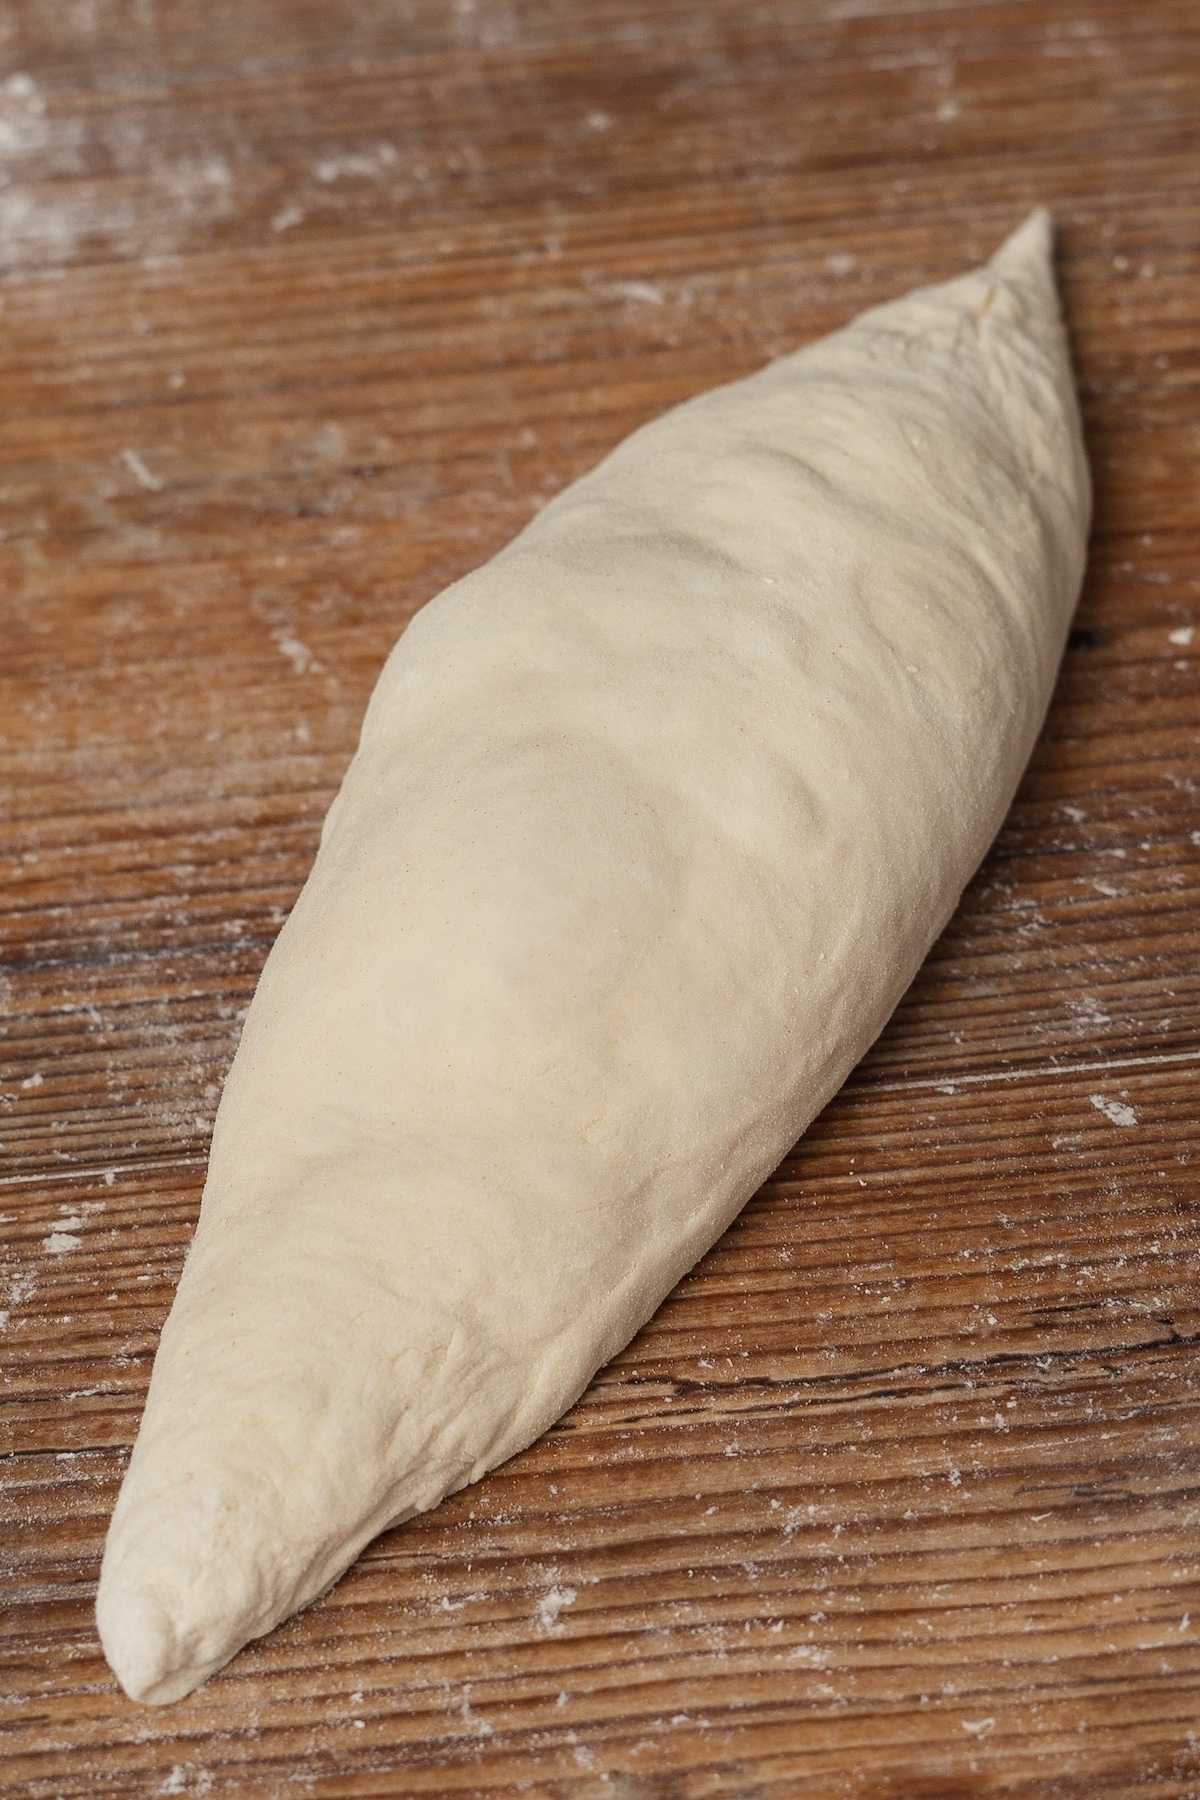
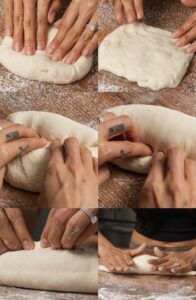
- Lightly flour your work surface again, then gently flatten the dough (but not too much) and roll the dough into itself, creating tension as you roll. Pinch the seam together, then roll into a tapered tube shape. Flouring the surface again after pinching the seams will help it roll smoothly without sticking.
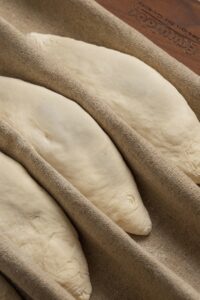
- Transfer the rolled out dough onto a floured baker's couche (or tea towel), seam side up. Fold up the sides of the linen to give the dough some side support. Cover with a damp towel and proof at room temperature for 30 minutes to 1 hour. How to tell when it is properly proofed and ready to bake: lightly flour your index finger, then gently press it into the dough. If it springs back quickly, it needs more time. If it slowly springs back about half way, it's ready. If it doesn't spring back at all and stays indented, it is over-proofed and should be baked as soon as possible.
Oven preheat & setup
- Meanwhile, preheat your oven to 450 degrees F. While it is preheating, place a baking steel on the top rack. The bottom rack should be positioned on the lowest level, and the top rack should be positioned two levels above (refer to photo).If you have some, I highly recommend putting some lava rocks in a cast iron skillet on the bottom of the oven. If you don't have lava rocks, just a cast iron skillet is fine.
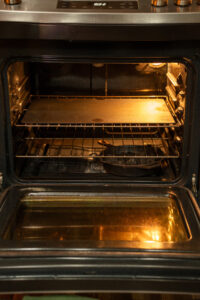
- Roll up 3 kitchen towels and put them in an oven-safe vessel. I'm using a cheap stainless steel pie pan (don't use something you care about- it will get ruined). Saturate the towels in boiling hot water.

- Prepare another cup of boiling hot water and set it aside for now.

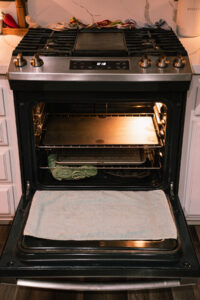
- Place the saturated towels on the bottom of the oven, right next to the lava rocks. The lava rocks are for the initial burst of steam, and the towels are for continuous steam. Refer to the photo below for the final setup. I also recommend locating the vents (mine is behind the stove grates) and blocking them with damp tea towels.*If you have an electric oven, you may be able to get away with just using the steam towels.
Prep & score dough
- Transfer the birotes from the bakers couche to an inverted baking sheet with parchment paper. I use a transfer peel for this. If using your hands, careful not to deflate or disrupt the shape of the dough too much.
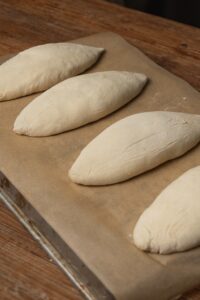
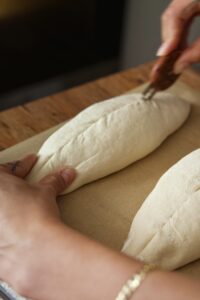
- Score the birotes about half an inch deep, straight down the middle.
Bake
- Open the preheated oven, place a dry towel on the oven door (to prevent the glass from shattering if any water touches it), then slide the birotes onto the baking steel and put the baking sheet on the bottom rack, right underneath the birotes so that the bottom doesn't burn.
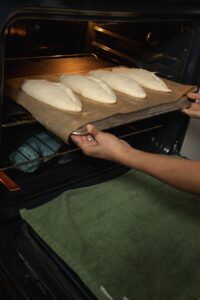
- Turn the oven OFF, then quickly & safely pour the remaining cup of boiling hot water onto the lava rocks, remove the towel and shut the door. Be very careful- do not put your face too close to the oven because there will be a huge burst of steam! *I use the "oven off" method for this recipe because I have a gas oven, and this is the ONLY technique that worked for me. This method allows for maximum oven spring, resulting in a beautiful belly and pronounced ear. If you have an electric oven, you may not need to do this but I can't be 100% sure because I haven't tested it.
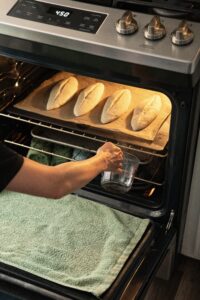
- Bake with the oven turned OFF for 20 minutes. After 20 minutes, remove the steam towels from the bottom, and spread the birotes out just a bit more so the sides bake evenly in case they are too close to each other. Turn the oven back on to 425 degrees F for 15-20 minutes, or until the crust is a nice golden brown color.
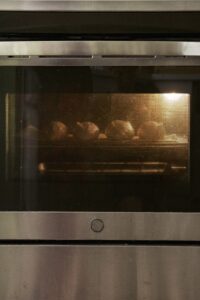
- The birotes are ready once they have reached an internal temperature of 205 degrees F and are a nice golden brown color on the outside. Rest on a cooling rack for at least 20 minutes to allow the crumb to fully set.
- To keep them as crusty as possible, store in a rolled up paper bag with toothpick-sized holes punctured throughout. Or, you can freeze them!
Nutrition information is automatically calculated, so should only be used as an approximation.


I have no training in bread making, but im mexican and i live in norway…of course i miss my food and this bread particularly. This recipe made me remember home and Im super happy someone shared it. Everyone can do it and I highly recommend it!!
Hi David! We spoke briefly over IG and your birotes looked amazing! I’m so glad you can have a little taste of home all the way in Norway. Thank you so much for making my recipe and leaving a review!
I think this is one of those recipes where if your location/environment isn’t an exact match, it’s not going to turn out quite right. I live in Mexico in a high altitude, high humidity environment. As such, the dough as per the recipe was exceptionally sticky and hard to manage. The levain was beautiful (although mine collapsed in the fridge after only 12 hours?!?! – I revived it though) and the flavor of my bread turned out tangy and nice, but the dough was threatening to over-proof the entire time and the “oven off” method ultimately did more harm to my spring than good.
Next time, I’ll adjust for humidity, will not do oven-off, and will probably do the same-day levain + bake. With any luck, I’ll get something airier and crispier.
Hi Nikki, thanks for trying my recipe! I do explain multiple times that this is not a beginner recipe, your environment will be a factor, and that the times provided are just a rough guideline. That being said, I’m glad you were able to get some decent bread. It takes a lot of practice, I’m sure you will perfect it for your home after a few tries and tweaks.
Wow super receta ! Muchas gracias 😃🙏🏽 siempre me pregunté cómo hacer para q estos birotes de Guadalajara me salieran y esta receta suena espectacular y además la técnica de horneado. He hecho varios panes con masa madre y creo q estos eran los siguientes, gracias.
This recipe is amazing and heed her warning, you gotta be prepared for some advanced tactics. We’ve only grown up on bolillos and I can say I’m converted to birotes being WAY better. Thank you again, we can’t wait to keep making these!