This post may contain affiliate links. Please see our disclosure policy.

In my last blog post, I showed you my steamed rice recipe using my Korean traditional gamasot (가마솥) pot. This time, I am going to show you how to make one of my favorite snacks of all time- scorched rice!
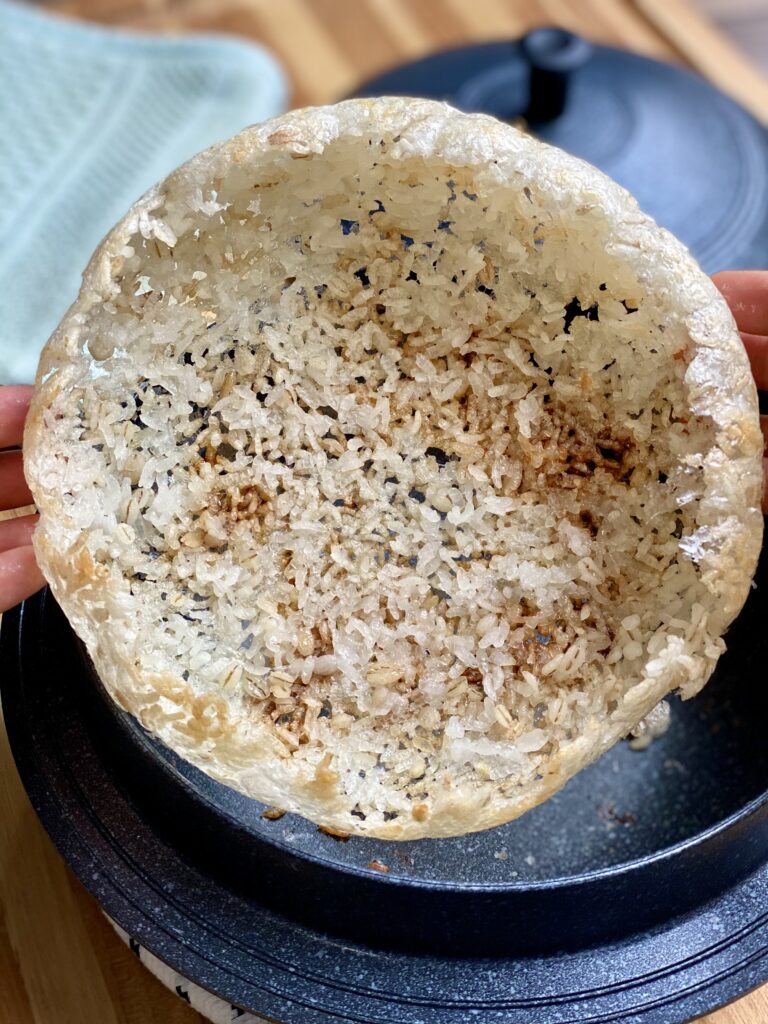
This is where the real work is done by this pot. The marble coating does wonders for making sure the rice does not stick! It will simply pop out and detach from the pot completely once it has dried and crisped up enough.
You can definitely achieve this without a marble coated pot, but it will take a lot of trial and error. I was able to get these same results with a heavy bottomed, stainless steel sauce pan in the past. The key is very low heat, uncovered, for 10-20 minutes.
By the way, if you are wondering how the heck you pronounce nurungji, it sounds like “noo-roong-ji.”
Where to purchase
*UPDATE* This pot is no longer available to purchase, I am very sad! I have looked EVERYWHERE to find the same exact one with no luck. Kitchenart has other gamasot pots, but you can only find them at Korean home stores.
I use the Kitchenart Gamasot Pot. It is made in Korea and it is the real deal! It has two sides of marble coating which makes clean up SUPER easy because your rice will NEVER stick to the pot!
I use the 20 cm pot and I think that one is the perfect size. You can make enough rice in it to feed a family of 5.
Note: this [was] an affiliate link, so I do make a very small commission from any sales that are generated from this link. Again, this post is NOT sponsored! I am recommending this product because I really love it and I think you will too.

How to make nurungji
To make nurungji, first you need to make rice. Actually, you don’t have to make rice first, but you do need some cooked rice to begin. I’m showing you the method I use after making a regular pot of rice, but there are other ways to make nurungji if you already have some made.
I make nurungji almost every day, because I make rice almost every day.
Cooking Method
To make the rice:
- Make sure you start by washing your rice! You want to wash it 3 to 4 times, or just until the water starts to run clear. You need to remove as much starch as possible, or the rice will be really gummy.
- Let the rice soak in water for 30 minutes. By letting your rice soak up some of the water, you reduce the cooking time which will result in a more aromatic rice. The longer you keep rice on heat, the less aromatic it will be. Cooking the rice for a longer period of time will affect the way it tastes, so I really recommend soaking first!
- After soaking, cook the rice COVERED for exactly 20 minutes on medium low heat. Turn off the heat and do not touch the rice for 5 minutes.
To make the nurungji:
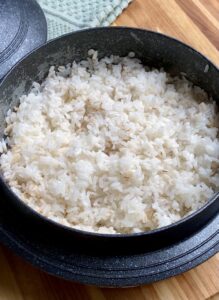
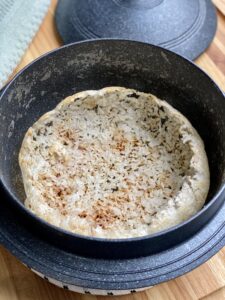
- After 5 minutes, uncover and gently fluff the rice using a rice paddle. Remove the rice from the pot, leaving a very thin layer of rice sticking to the bottom and sides. If there are any open patches, you can just leave them or you can fill them with rice if you’re a perfectionist like me.
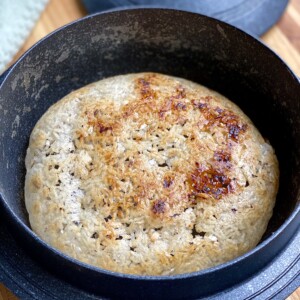
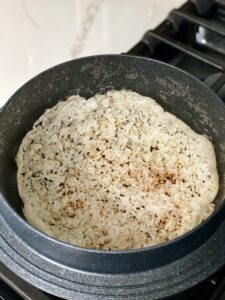
- Put the pot back on the stove, uncovered, on very low heat for 10-20 minutes. The time really depends on the pot you are using and how strong your stove is. For me, it takes about 15 minutes.
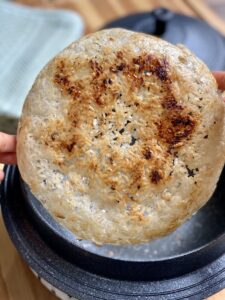
- I recommend setting a timer especially if you are using anything other than a gamasot. These pots evenly distribute heat so that nothing will ever really burn, but any other type of pot will not. You will also need to check on it periodically so you can tell when it’s done. You will know it’s done when it starts to separate itself from the pot and is easily & cleanly removed.

What does nurungji taste like? What is the point of scorching it?
I get asked this question a lot when people see me making nurungji. It took a while for me to be able to describe why this is done, but I’ve yet to come up with an exact description of the actual taste. Here’s the best way to describe scorched rice:
Think of when you toast bread. Not only does it change the texture, it also changes the flavor. It tastes…toasty haha. But you get the idea. The same concept can be applied to scorched rice. Crunchy texture with a “scorched” or “burnt” flavor that has a very distinct aroma.
Other ways to enjoy nurungji
Instead of cooking the rice until it gets crunchy like the one I showed you above, you can cook it until it is about 1/2 scorched so that there are still some soft grains of rice. Sometimes I like eating my nurungji this way. It’s also the way you prepare Sungnyung, which is scorched rice tea. I’ve actually never called it that in my life (I still just call it nurungji), but this is the correct term for it.
Sungnyung (숭늉) is a traditional Korean infusion of nurungji and water. I prefer using boricha (barley tea), and I like it to be ice cold! When you remove the rice and leave that outer layer to scorch, just add the water or tea and let it infuse for a few minutes. This scorched rice tea with some kimchi or jeotgal (salted seafood) is soooooo good! Also somewhat known as a poor man’s meal in Korea.
Another common way to make nurungji is to add sugar! There are two ways you can do this- just sprinkle sugar over the nurungji before you start to scorch it and enjoy just like that when its done. Or, you can deep fry it after that for an even tastier treat. My mom used to make it like this all the time.
Nurungji 누룽지 (Scorched Rice)
Ingredients
- 1 pot cooked rice, recipe linked below in instructions
Optional Ingredients
- sugar
- water
- boricha (barley tea)
Instructions
- Make a pot of steamed rice.

- After fluffing the rice, remove it from the pot but leave a thin layer of rice sticking to the outer edge. If there are open patches, you can fill them in with rice and use the rice paddle to press it in and even it out.Optional: Sprinkle some sugar over the rice for a sweet treat!

- Put the pot back on the stove on low heat, uncovered for 10-20 minutes. Timing really depends on the type of pot you have and the strength of your stove. For me, it usually takes about 15 minutes. I recommend setting a timer! Start with 10 minutes and then just keep an eye on the nurungji after that. About 1/2 of the way through, you should be able to wiggle the nurungji around and it will slide right off the pot. You can take it out at any point after that (depending on how crunchy or soft you want it). Or, you can turn the heat off and enjoy it as Sungnyung. Just fill with some water or barley tea and let it infuse for a few minutes before eating.
- I keep mine on until it gets completely crunchy, and you will know it is done when the sides start to curl in and the rice is completely dry. You should be able to lift it right out.
- Enjoy right away or store in a tight ziplock bag for up to a week.

Nutrition information is automatically calculated, so should only be used as an approximation.


I wanted to buy the pot and get you a lil’ commission – but they must not sell these on Amazon anymore. Sorry!!