This post may contain affiliate links. Please see our disclosure policy.

My mom threw out her rice cooker YEARS ago and traded it for a Korean marble coated pot. I know most Asians swear by their rice cooker, but in my opinion you really do not need one to make perfectly steamed rice!
I use a gamasot (가마솥) pot to make my rice, but you don’t need it for this recipe (although I highly recommend one). It is a traditional Korean cooking pot that has been used for centuries. I think it is WAY better than a rice cooker!
Even if you don’t have a gamasot, I still prefer cooking rice on the stove. All you need is a heavy bottomed pot.
Why I prefer cooking rice on the stove
The main reason I prefer making rice this way is because the texture comes out perfect every single time, with very little effort. Plus, you save counter space and money by not using a rice cooker.
Another reason I cook rice on the stove is because I LOVE nurungji! Nurungji is scorched rice, which is made by leaving a thin layer of rice on the outer edges of the pot to cook until they become crispy. Here’s how to make it.
Lastly- I prefer cooking rice on the stove is because you can’t really use a rice cooker to make ALL types of rice.
I make Mexican rice, Cuban rice, and coconut garlic rice pretty often and you need to do this on the stove because of all the added ingredients that are added at different times and need to be sautéed.
Ingredients
- Short grained white rice – there are many brands you can choose from, but I do not have a preference. I just buy whatever is on sale, and always a Korean or Japanese brand.
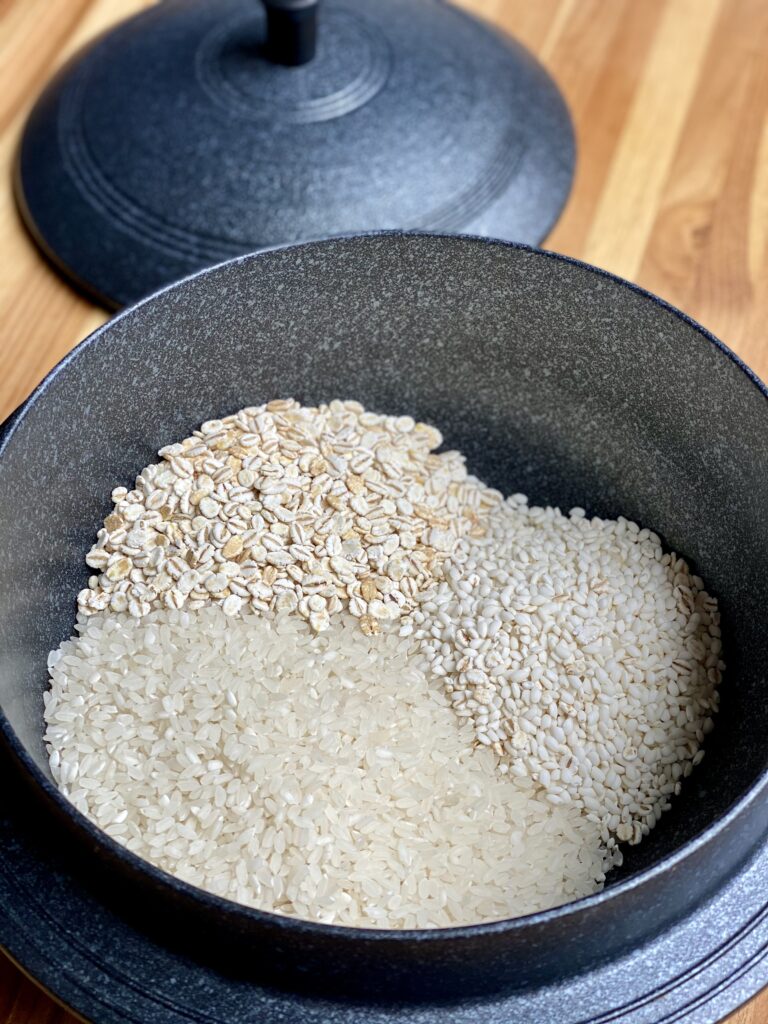
- Pressed or rolled barley- barley has a lot of fiber and protein. It has a chewy texture and slightly nutty flavor. The ratio of white rice to barley that I use is 4:1
- Sweet rice (glutinous rice)- I use the same ratio of sweet rice as the barley. It adds a tiny bit of sweetness to the rice, and is also stickier. I love the subtle flavor of all of these grains combined! This is how my mom has made rice for years.
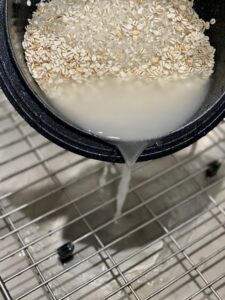
- Water– Unfortunately, I do not have any “fool proof” ways to measure rice against water. I’ve made thousands of pots of rice and just learned how to eyeball it. But my mom taught me a trick a while back for how you can measure it- Lay your hand flat on top of the rice and make sure the water is just covering your knuckles. Works every time!
You can also only use short grain white rice if you prefer. Sometimes I only use short grain white rice, and sometimes I even add other types of grains like wild rice to make Korean purple rice!

Cooking Method
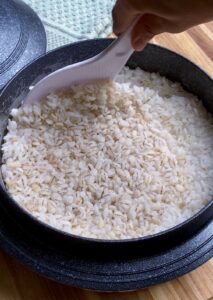
- Make sure you start by washing your rice! You want to wash it 3 to 4 times, or just until the water starts to run clear. You need to remove as much starch as possible, or the rice will be really gummy.
- Let the rice soak in water for 30 minutes. By letting your rice soak up some of the water, you reduce the cooking time which will result in a more aromatic rice. The longer you keep rice on heat, the less aromatic it will be. Cooking the rice for a longer period of time will affect the way it tastes, so I really recommend soaking first!
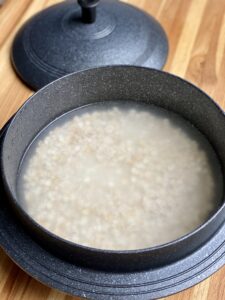
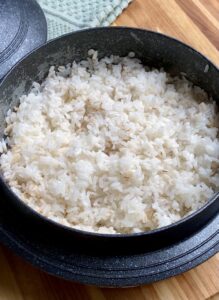
- After soaking, cook the rice COVERED for exactly 20 minutes on medium low heat. Turn off the heat and do not touch the rice for 5 minutes. After 5 minutes, uncover and gently fluff the rice using a rice paddle.
Nurungji
Nurungji (누룽지) is scorched rice- I make this every single time I make rice and it is one of my favorite snacks! It is the crunchy rice that is usually left at the bottom of the pot and can be slightly burnt. These are the best parts of rice!

Perfect Steamed Rice
Ingredients
- 1 cup short grain rice
- 1/4 cup sweet rice (glutinous rice)
- 1/4 cup pressed barley, or rolled barley
- water
Instructions
- Rinse your rice under cold water until it runs clear, about 3-4 times.

- When adding water, I place my hand flat on top of the rice and cover with enough water to just cover my knuckles. Let the rice soak for 30 minutes. *If using a rice cooker or pressure cooker, you can skip this step.
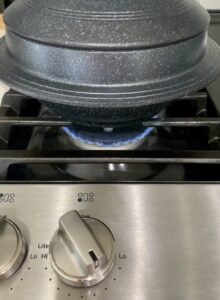
- Cook the rice COVERED on medium low heat for exactly 20 minutes. Heat settings may vary depending on the thickness of your pot and the strength of your stove. Please refer to the photo to see flame and heat setting on mine.

- After 20 minutes, turn off the heat and let the rice rest for 5 minutes with the lid still on. After 5 minutes, remove the lid and gently fluff the rice with a rice paddle.

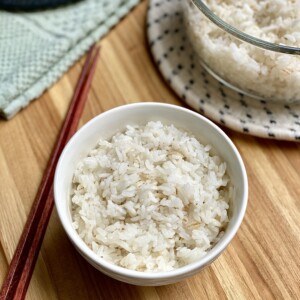
- Rice is ready to serve once it has been fluffed and each grain of rice can be seen distinctly (not mushed together or broken).

Nutrition information is automatically calculated, so should only be used as an approximation.


