This post may contain affiliate links. Please see our disclosure policy.
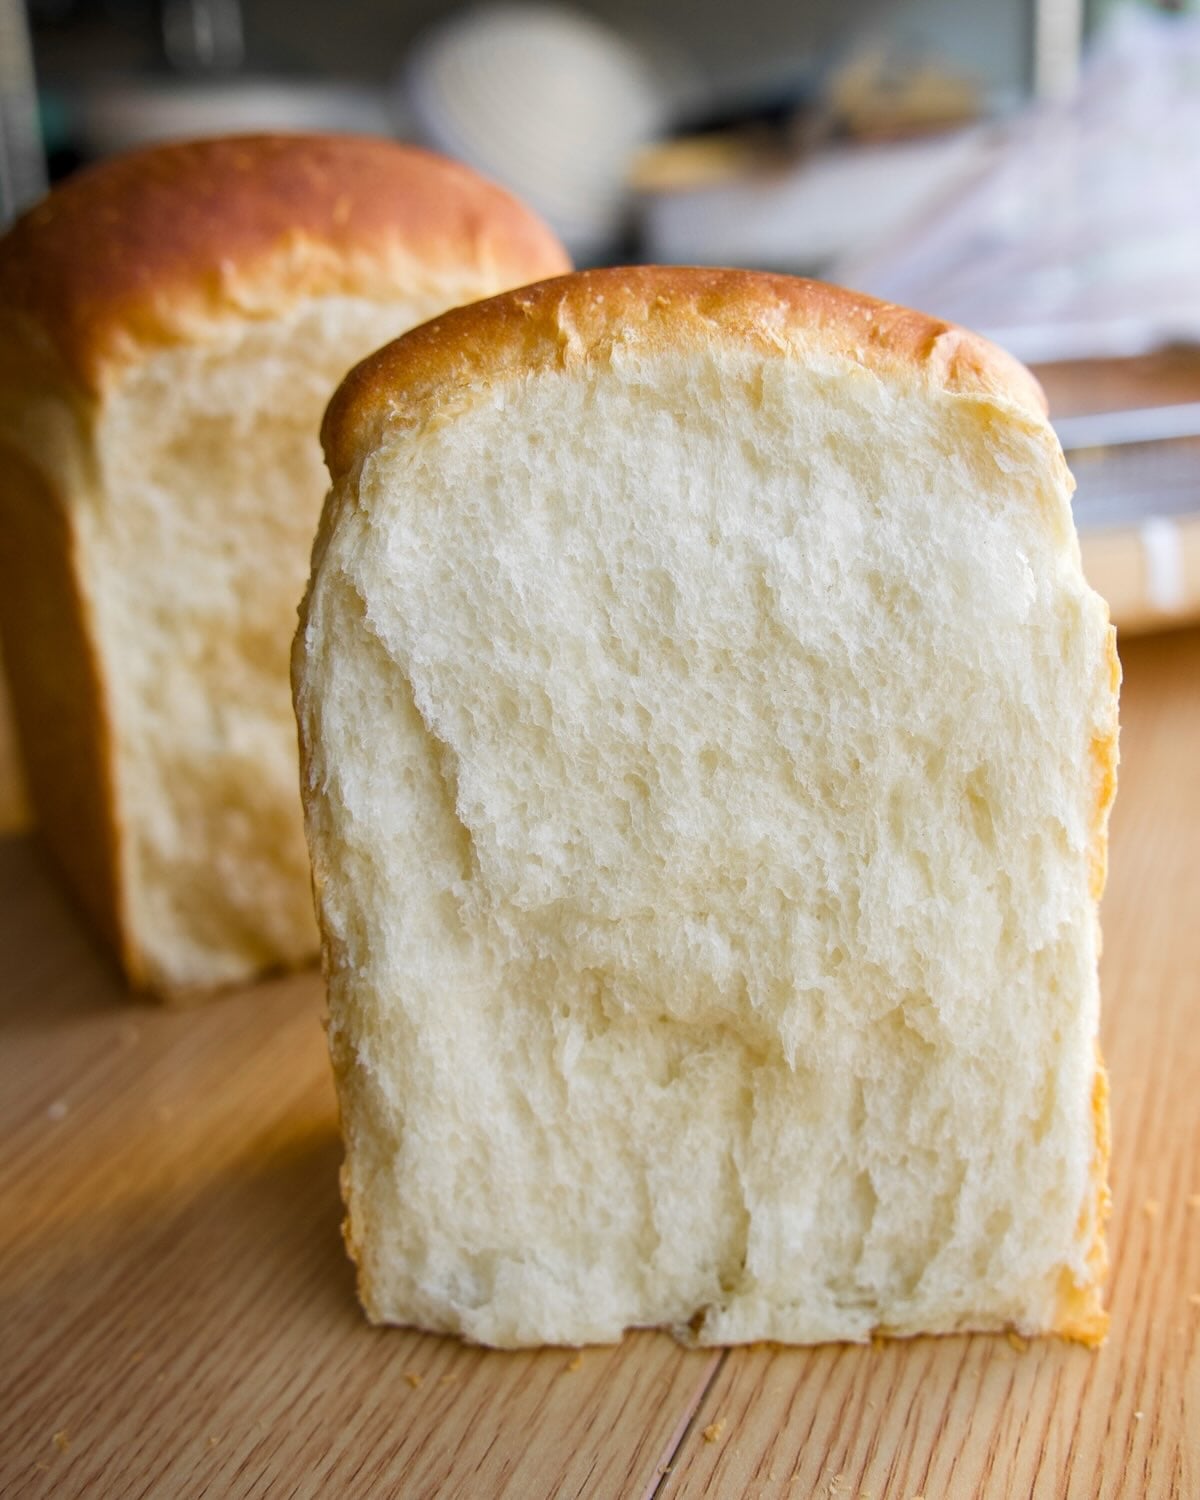
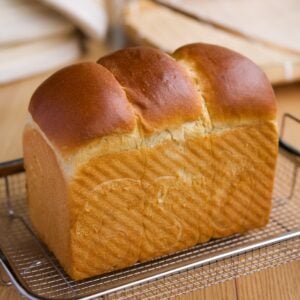
This Sourdough Milk Bread is irresistibly soft & fluffy. It’s made with a sweet stiff starter (instead of yeast), which reduces tang, improves texture, and builds richer, more complex flavors. Perfect for Korean Street Toast!

Today I’m sharing how to make Milk Bread with your sourdough starter! A few years ago, I started studying sourdough just to learn how to make Birote Salado (Mexican Sourdough Bread) for my dad – but I never expected I’d end up loving it and getting really good at it.
What began as a single recipe quickly grew into a deeper interest in sourdough baking, and this milk bread is a product of that journey. I wanted to apply what I’d learned to something completely different: a soft, enriched bread with no sourness.
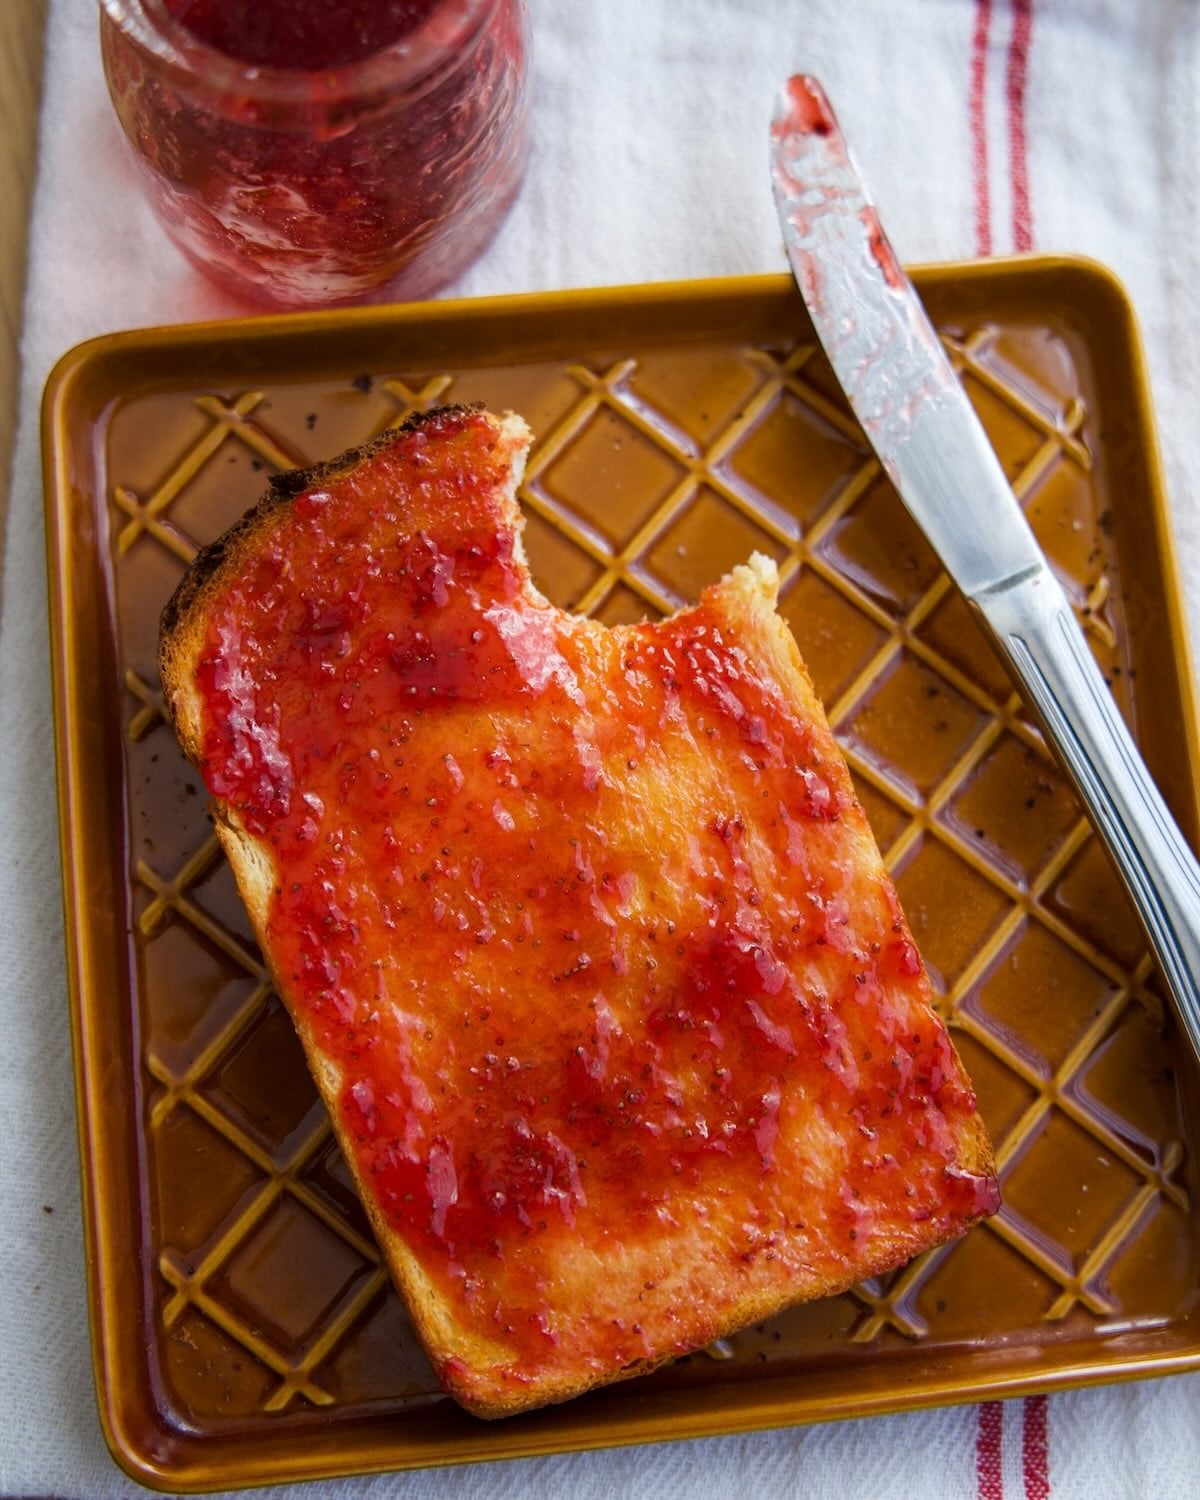
Also, milk bread is my favorite kind of bread. Its subtle sweetness, pillowy texture, and delicate chew are so special. As a child I ate it plain, but these days I love it toasted with salted butter and homemade strawberry jam. Simple yet indulgent – and even better after a day in the garden (if you know, you know).
What is Milk Bread?
Milk bread is a soft, enriched bread known for its pillowy texture, fine crumb, and subtle sweetness. It’s commonly associated with Asian-style breads and pastries, originating in Japan (called shokupan) and popularized across many cultures.
What makes milk bread unique is its use of a technique called tangzhong, which is a roux made with milk and flour to retain moisture and keep the bread soft for longer. Milk, sugar, and butter are also used in the final dough, giving it a rich & tender texture.
Why You’ll Love This Recipe
- Soft, pillowy texture with a delicate, melt-in-your-mouth chew.
- Lightly sweet, milky flavor that’s compatible with both sweet & savory applications.
- Tender, shreddable crumb that pulls apart easily – perfect for toast or sandwiches like my Korean Street Toast (Gilgeori Toast) recipe.
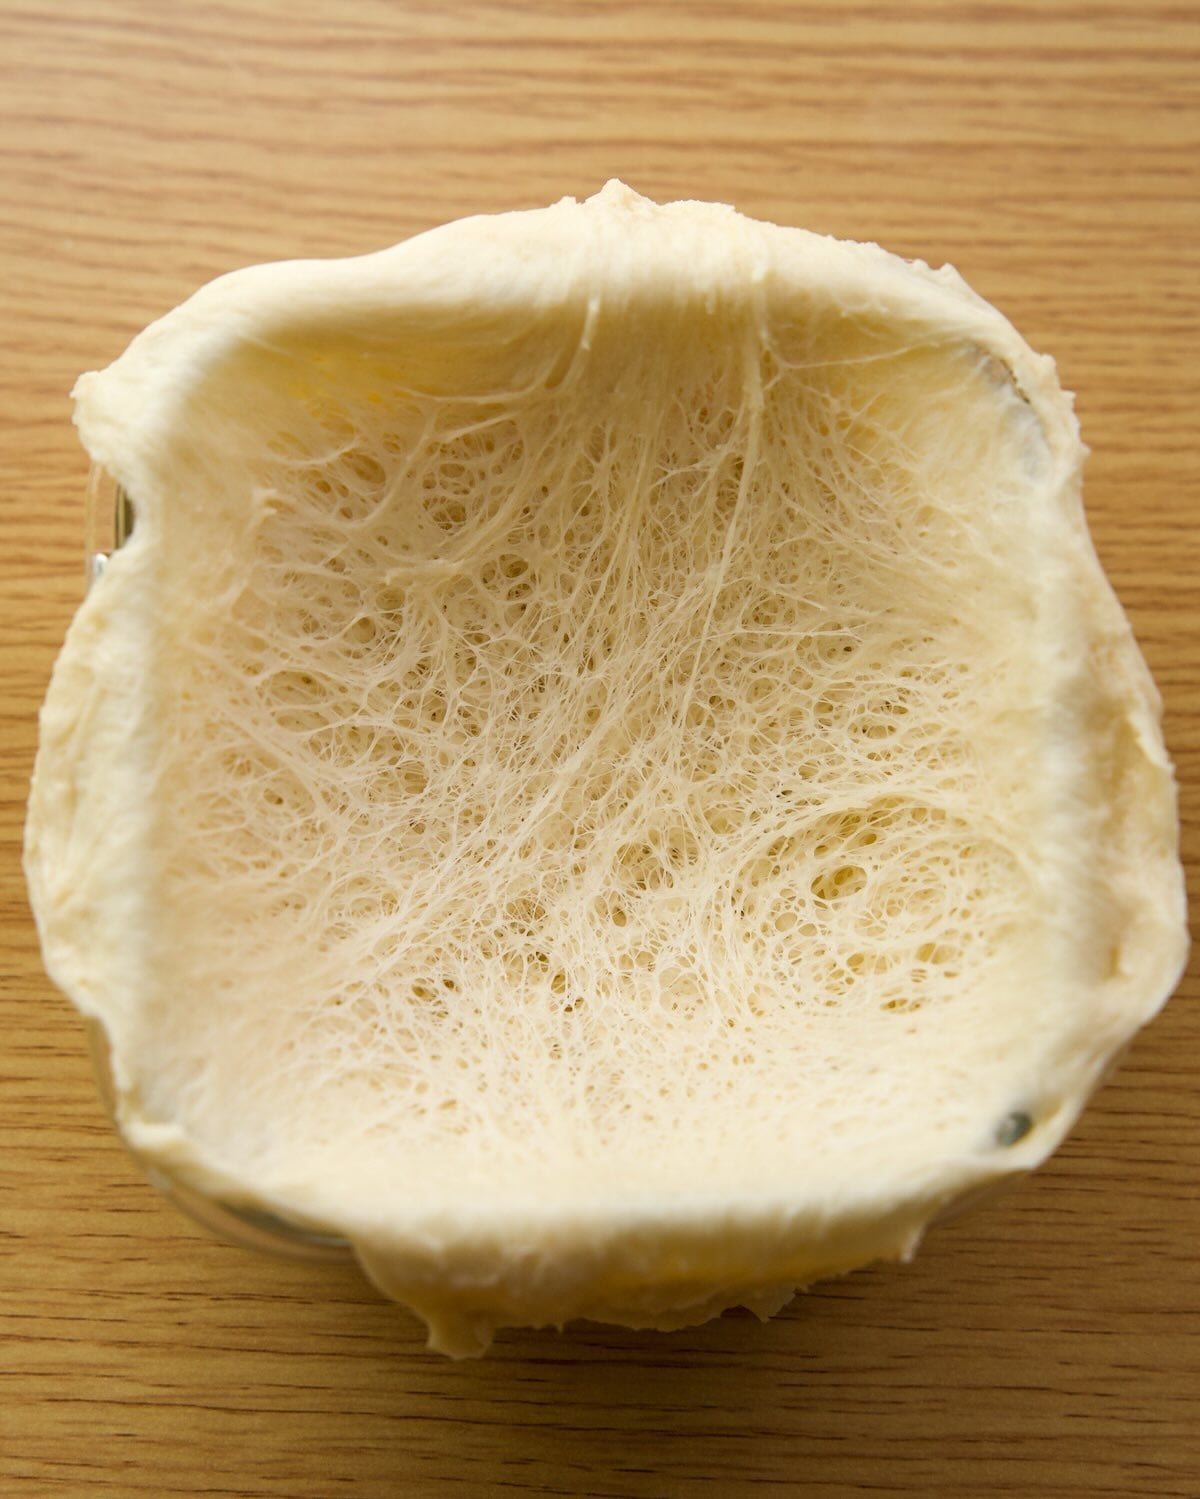
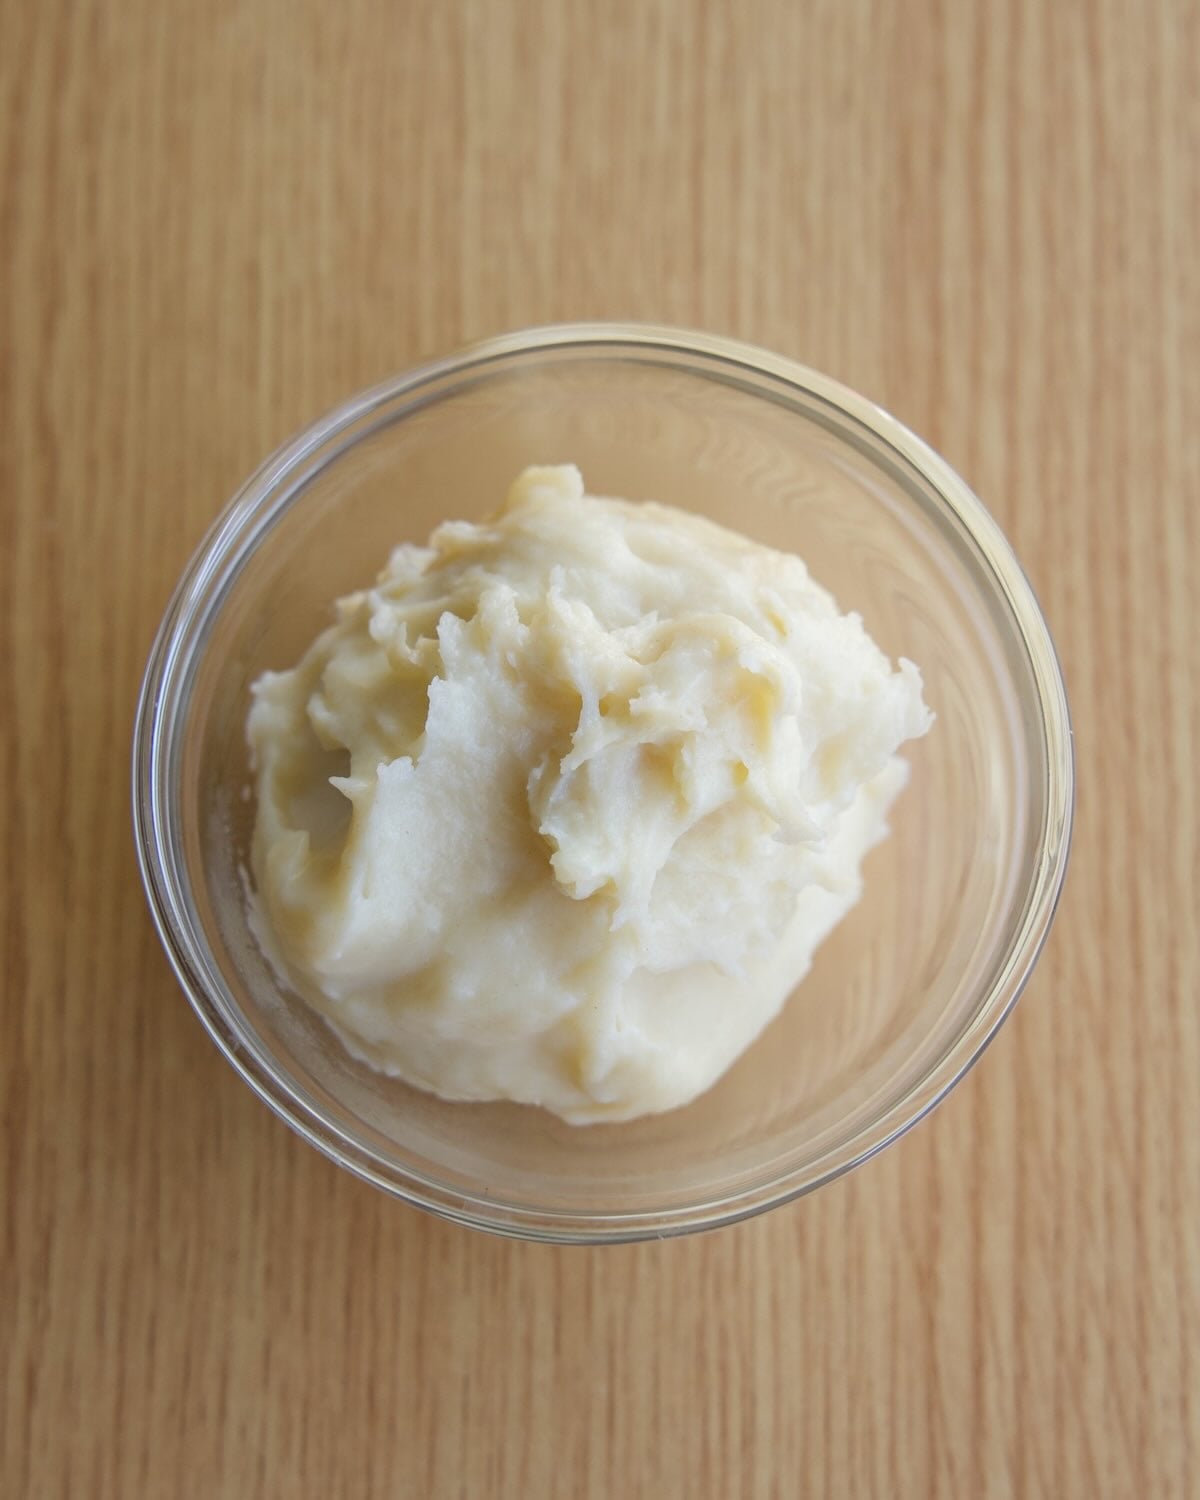
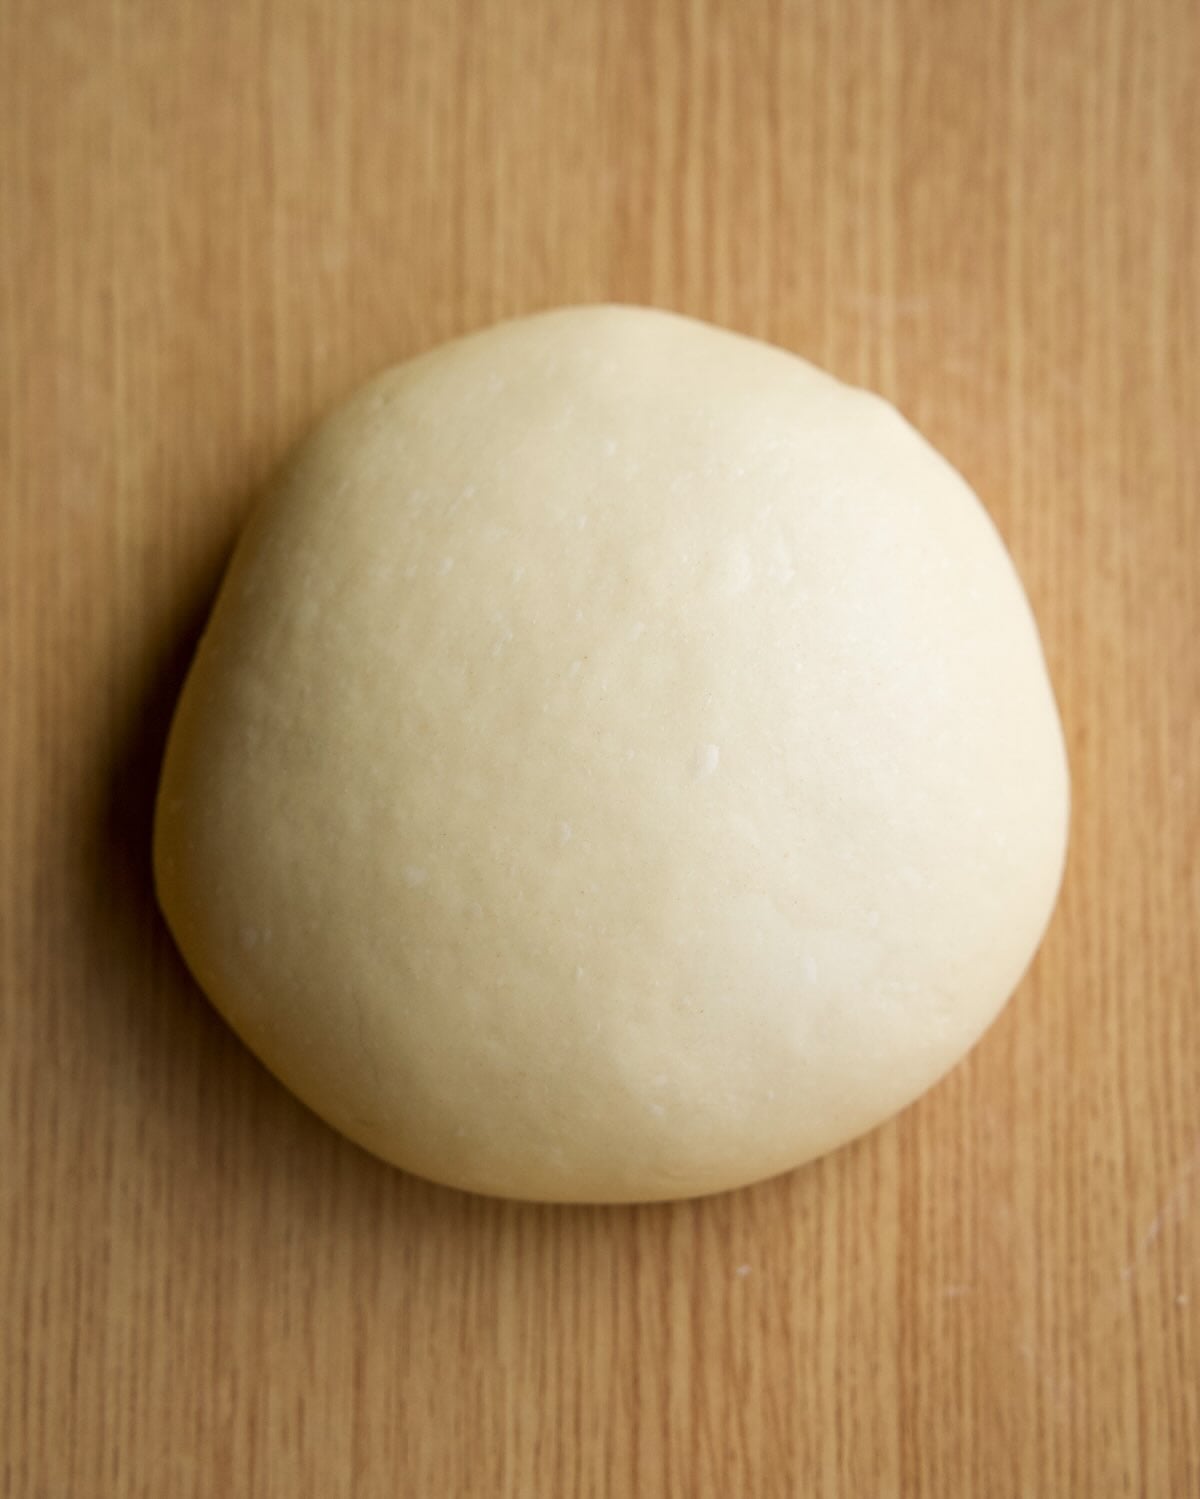
Sweet stiff sourdough starter at its peak, stretched to reveal a strong, elastic gluten network.
Why Use Sourdough Starter for Milk Bread?
You might be wondering: what’s the point of making milk bread with a sourdough starter if it’s not going to be sour? Well, that’s exactly part of the challenge I set for myself with this recipe.
I’m not much of a traditional yeast baker, but since harnessing sourdough I love experimenting with it. Milk bread is naturally soft, slightly sweet, and definitely not sour, so the idea of using my starter for it felt like a fun challenge – could I make it pillowy and tender without introducing any tang?
After a lot of trial & error, the solution turned out to be a sweet stiff starter combined with temperature control. I learned about this method from my favorite sourdough resource, Laila, through her Sourdough Cinnamon Rolls Recipe, and applied it here with great success. This technique works on three levels:
- Fermenting at warmer temperatures encourages yeast growth over bacteria, reducing sourness.
- Adding sugar feeds the yeast and further curbs tangy flavors
- Using a stiff, lower-hydration starter strengthens the dough and supports a tender, pillowy crumb.
Beyond that, using a sourdough starter helps with skill-building. It taught me even more about timing and fermentation control. Plus, enriched bread made with a starter tends to stay fresher longer, which is always a bonus.
So even though milk bread is usually a “yeast-only” kind of recipe, using sourdough here is as much about experimentation & learning as it is about the final loaf – and that’s what makes sourdough baking so rewarding!
Ingredients You’ll Need:
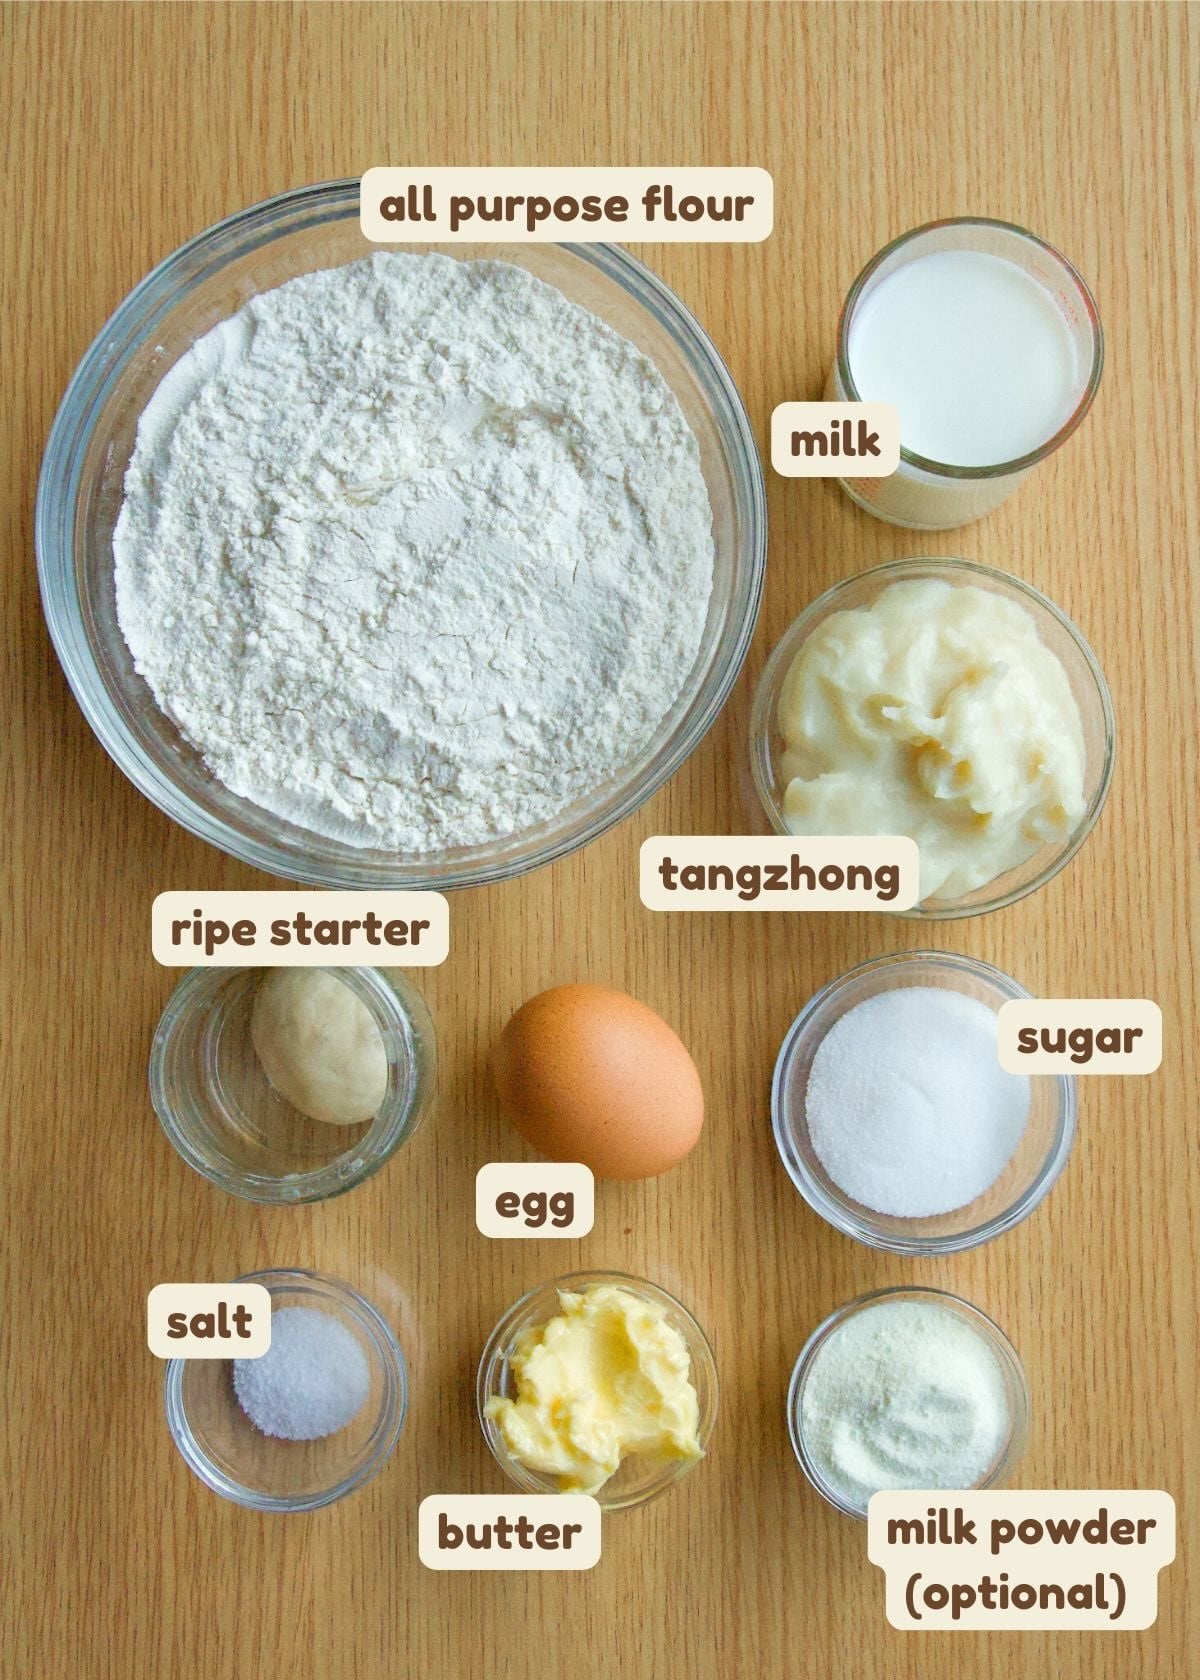
- Flour – I use Costco’s organic all-purpose flour. Keep in mind that this flour is slightly stronger than most AP flours, closer to a bread flour at ~11.5% protein, which helps give structure to the milk bread.
- Tangzhong – A roux made with milk and flour. This step boosts moisture, improves shelf life, and creates that soft, tender crumb.
- Milk – I use 2% milk for this recipe, but whole milk works too.
- Sourdough starter – I maintain a stiff starter, but a liquid (100% hydration) starter will still work as long as it’s had healthy feedings (not too acidic).
- Egg – Adds richness, color, and tenderness to the dough.
- Sugar– Contributes subtle sweetness, enhances browning, and helps feed the yeast in the dough.
- Butter – Enriches the bread, softens the crumb, and adds flavor.
- Salt – Balances sweetness and strengthens the gluten structure in the dough.
- Milk powder – This is totally optional! It adds a touch more richness, tenderness, and helps the crust brown. I use Carnation Non-Fat Milk Powder.
How to Make it:
Please see the step-by-step instructions with photos below. For the full recipe with ingredient amounts, jump to the recipe card.
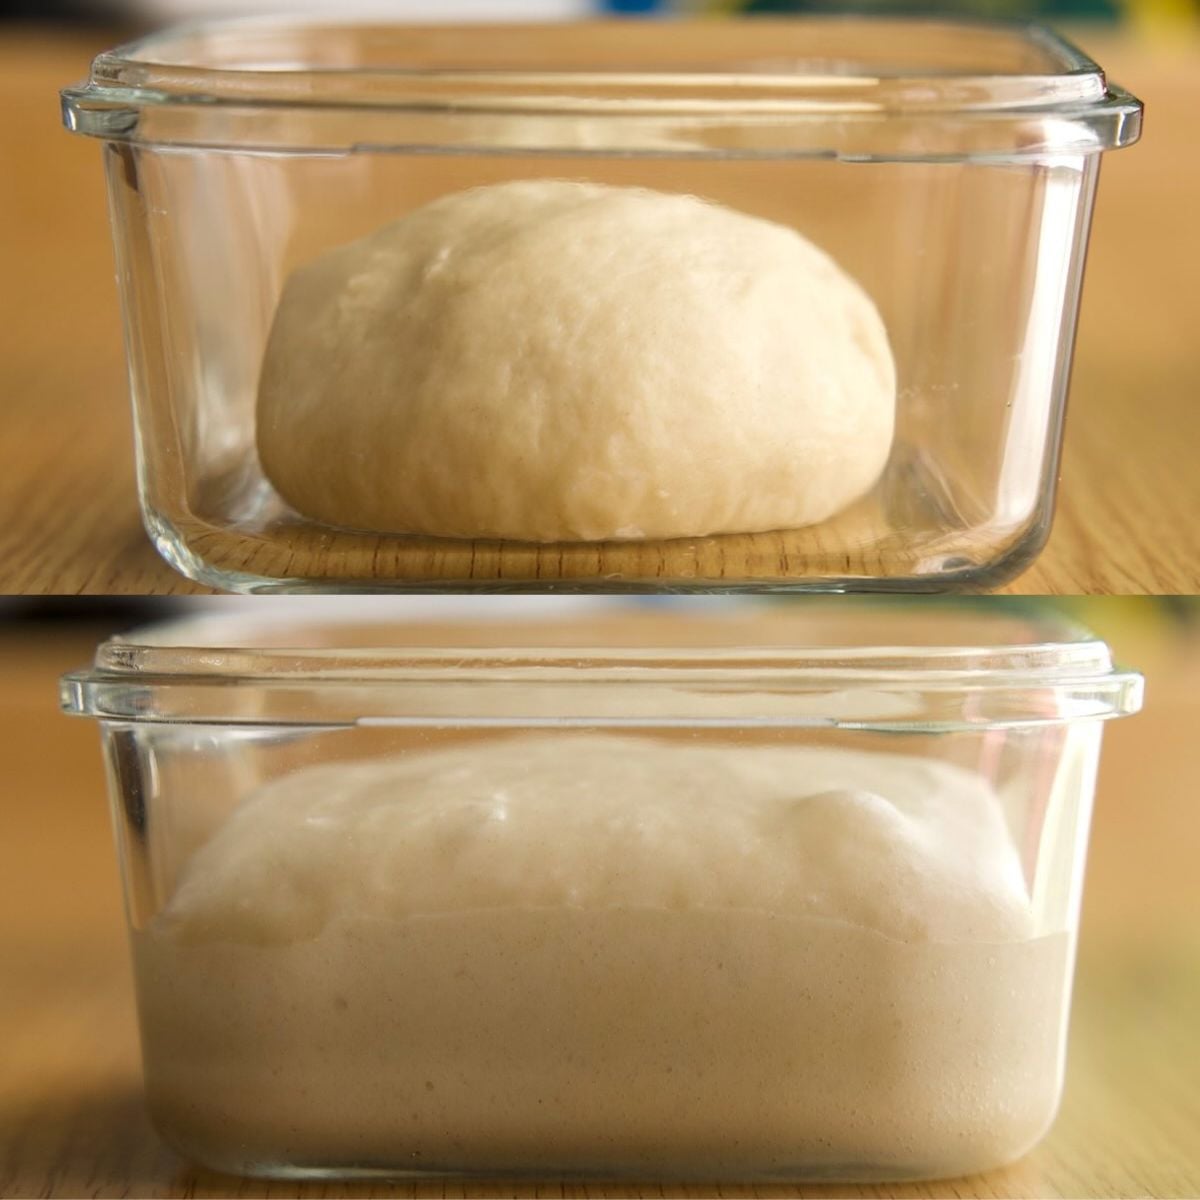
- Combine sourdough starter, water, flour, and sugar to make the sweet stiff starter. Knead briefly by hand, then ferment at 78–85°F until peaked, about 5–6 hours.
- Combine milk and flour in a saucepan over medium-low heat. Stir frequently until it thickens to a smooth, custard-like paste (3-4 minutes), then set aside to cool.
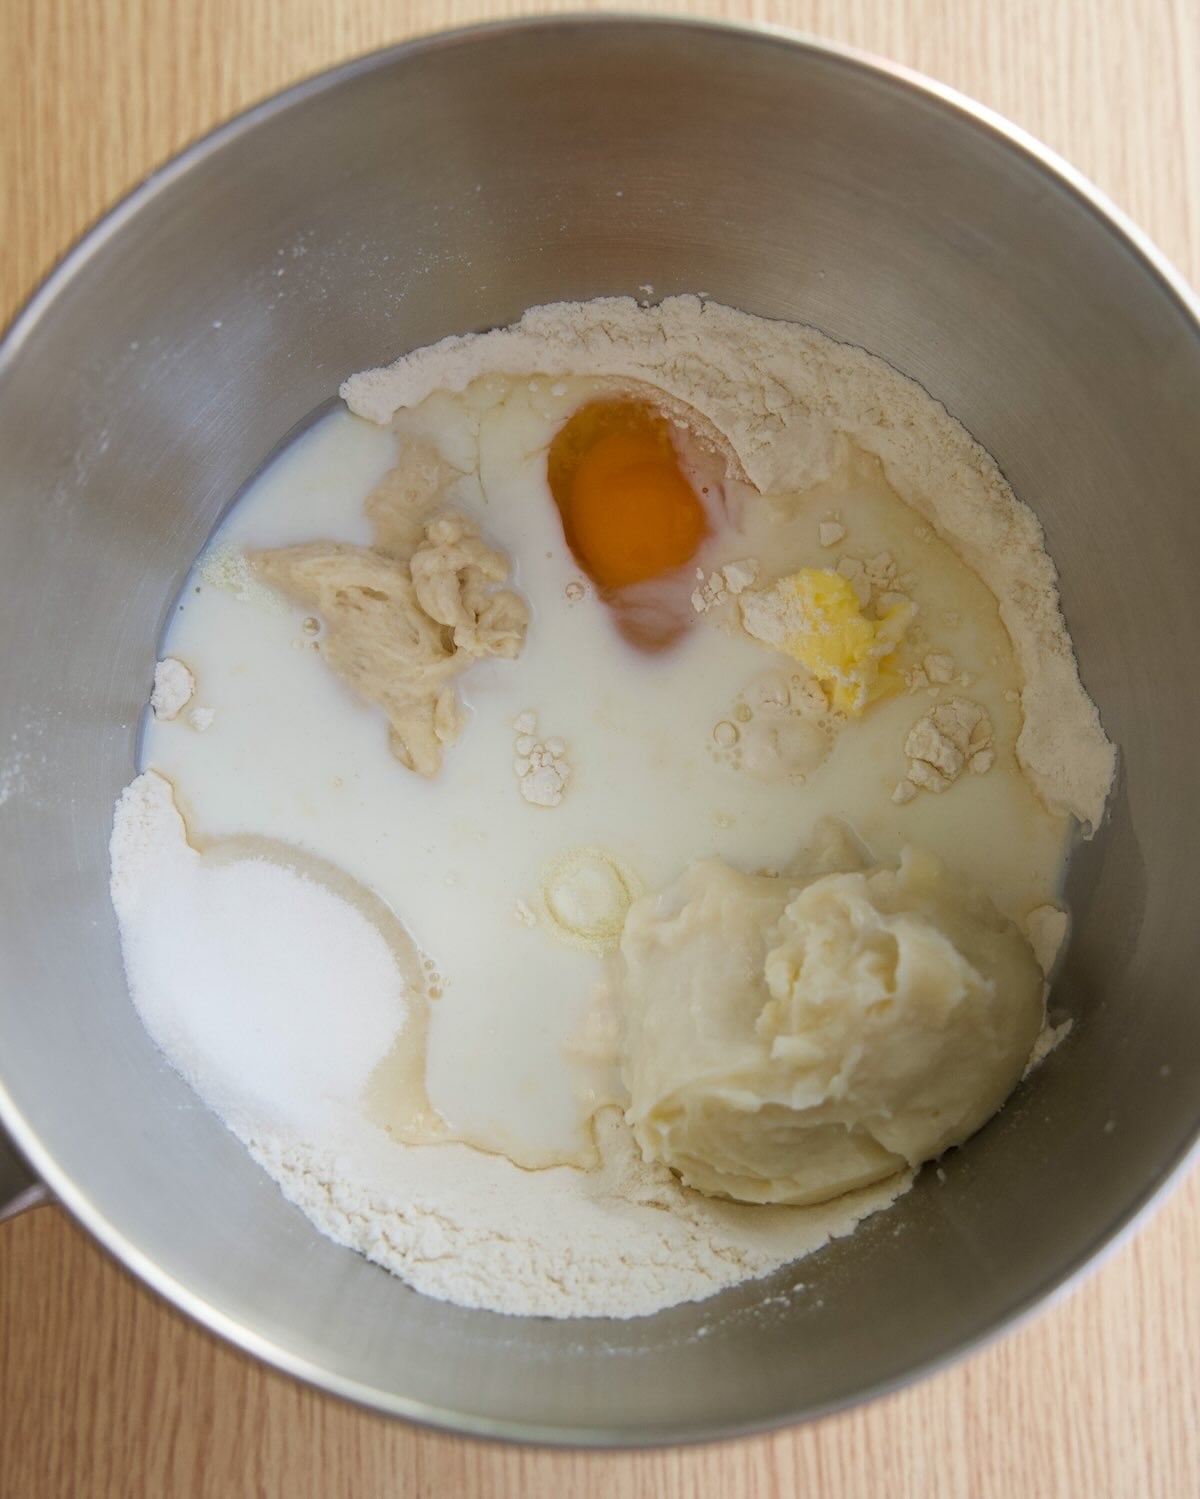
- In a stand mixer bowl fitted with the dough hook: combine flour, sweet stiff starter, tangzhong, egg, sugar, butter, salt, milk, and optional milk powder.
- Mix on low (“stir”) speed for 1–2 minutes until just combined, then scrape down the sides of the bowl.
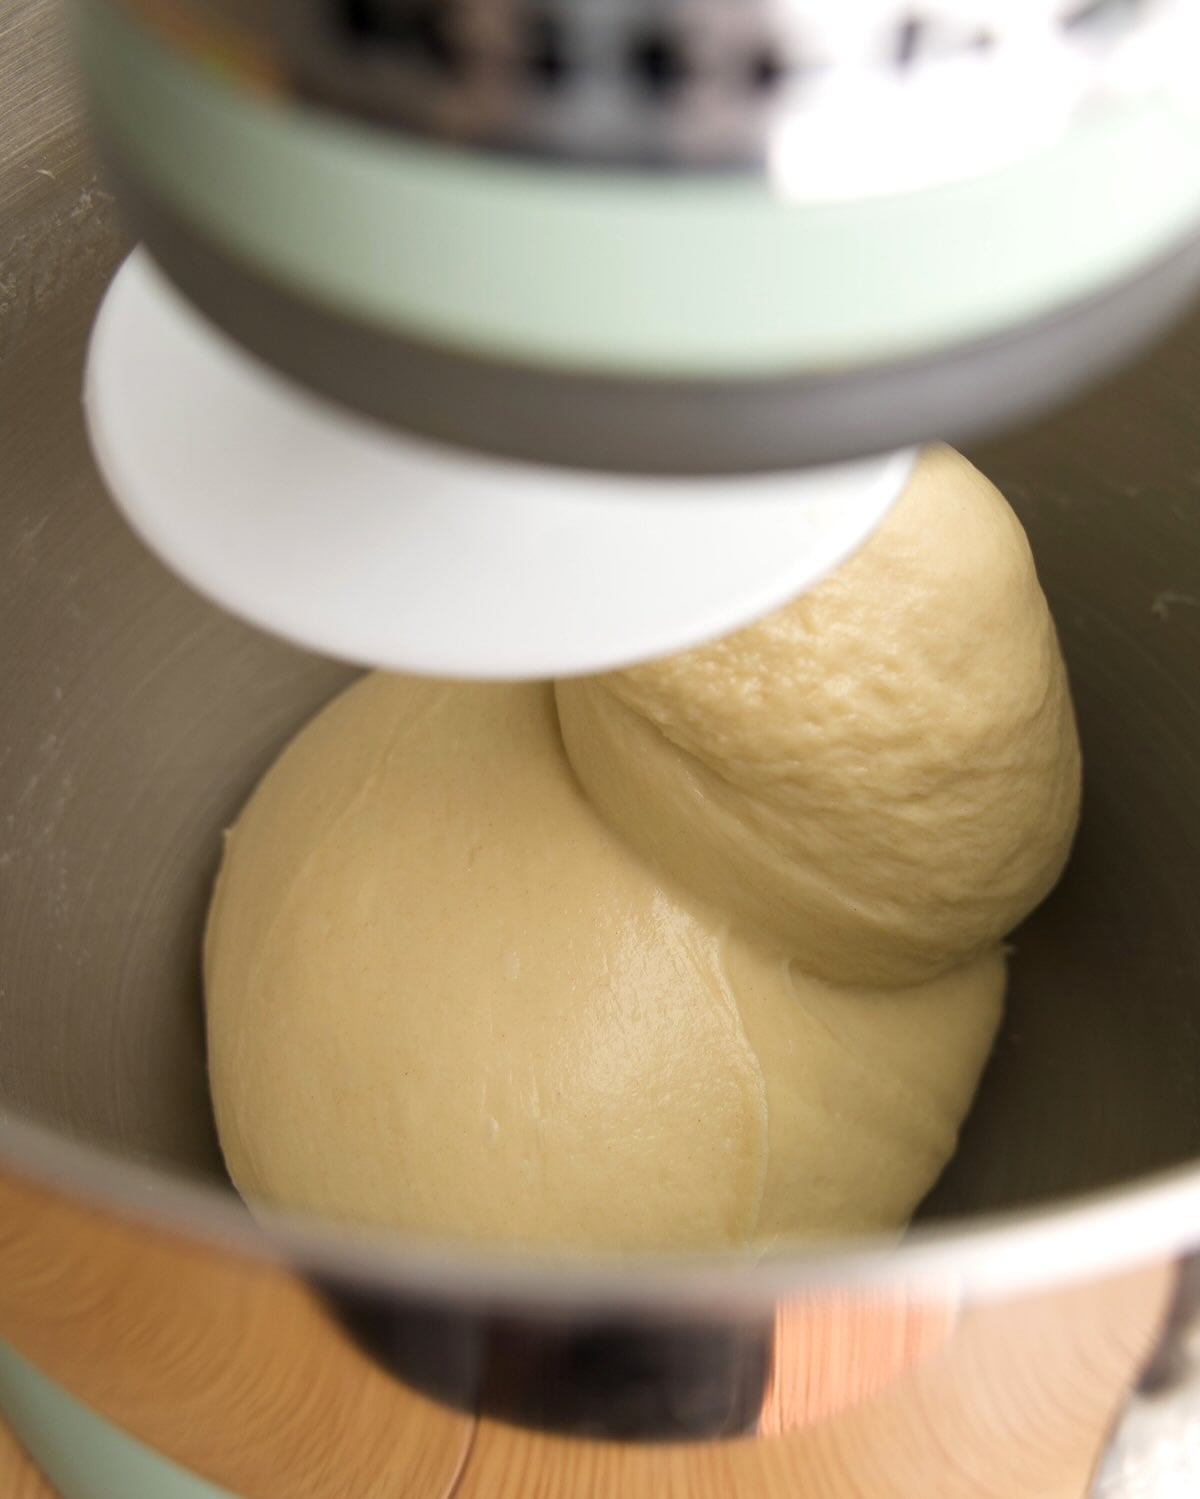
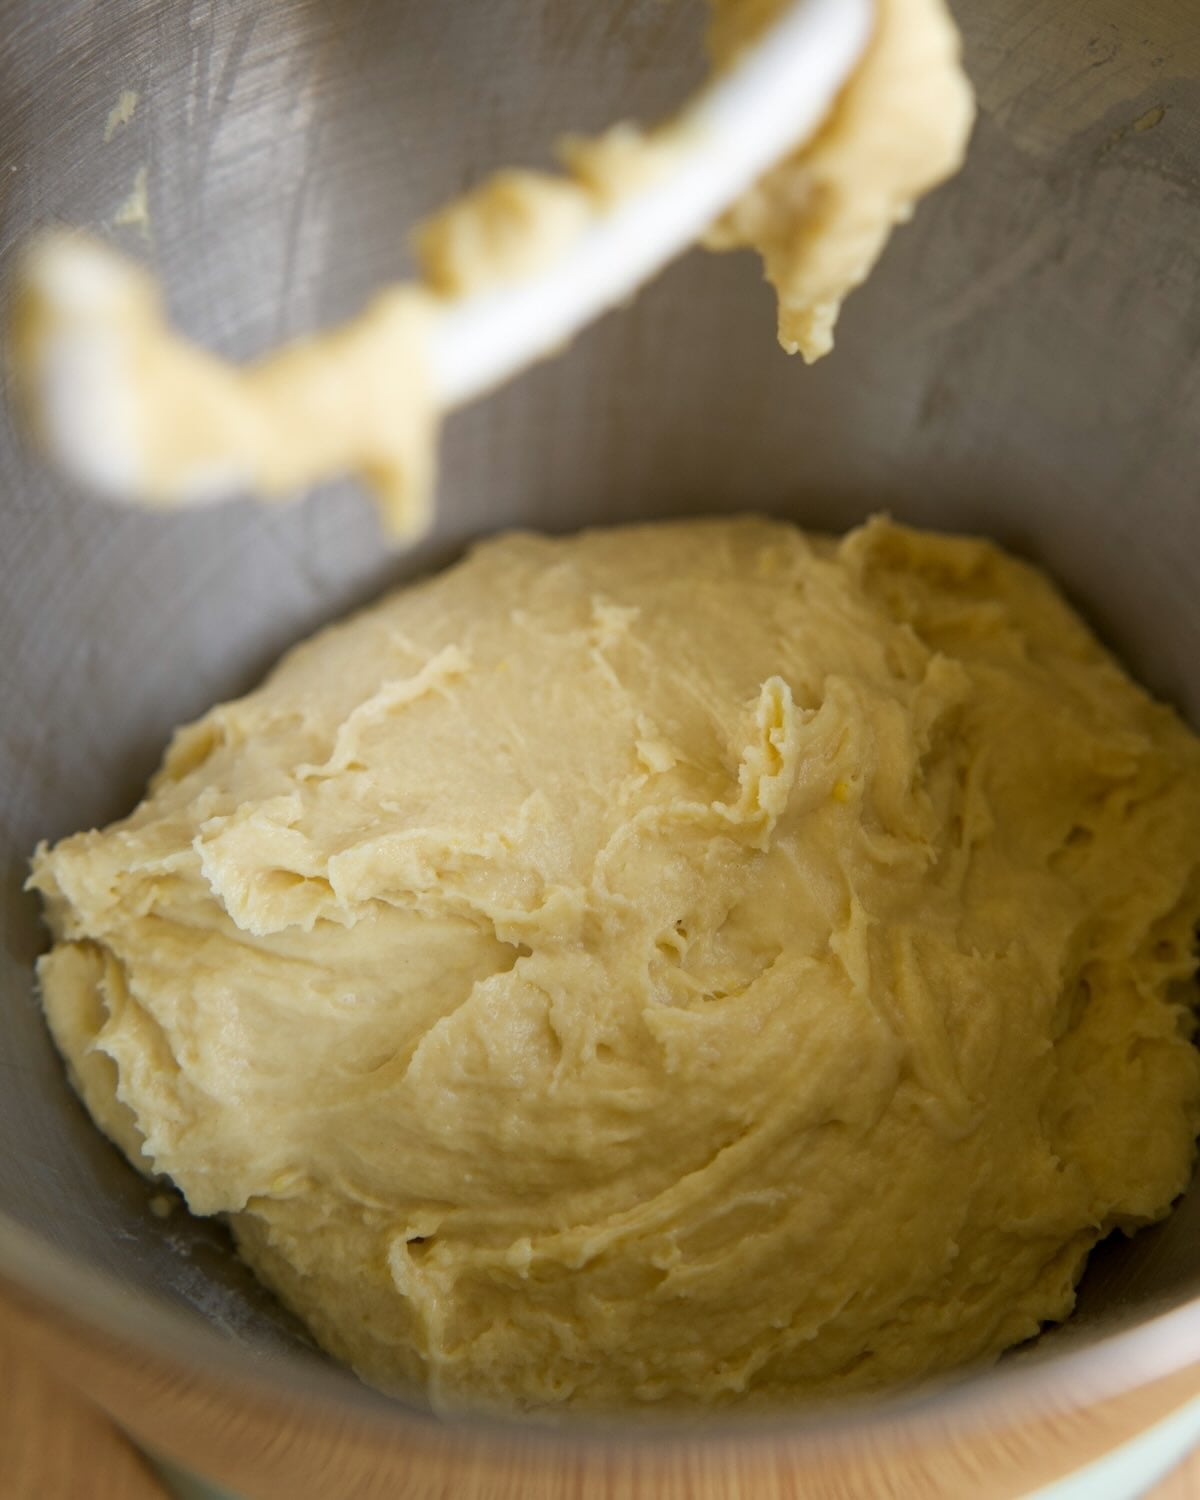
- Increase to speed 4 (medium) and mix for 4 minutes, then reduce to speed 2 and knead 6–8 minutes, or until the dough forms a smooth ball that pulls away from the bowl.
- Turn the dough onto a lightly wet surface and perform a few slap-and-folds, shaping it into a smooth, taut ball.
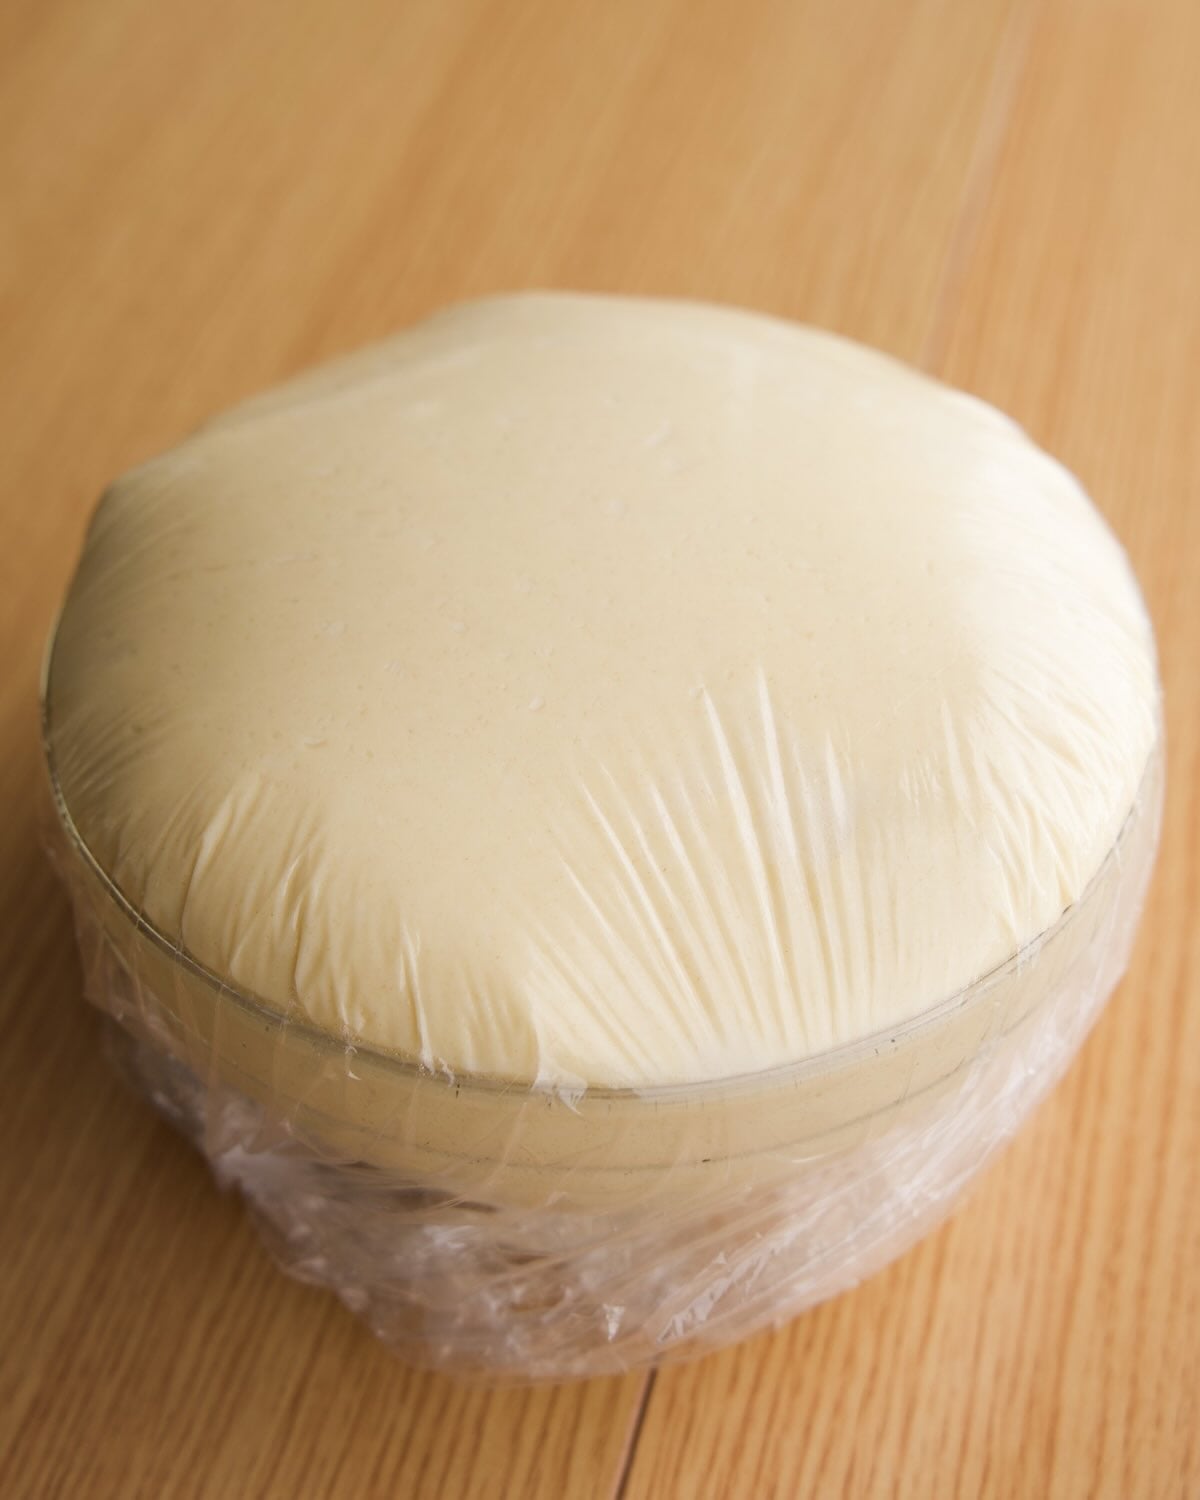
- Place the dough in a lightly greased bowl, cover, and proof until doubled in size (refer to time & temperature guide below).

- Turn the fermented dough onto a lightly floured surface and divide it into 2 or 3 equal pieces.
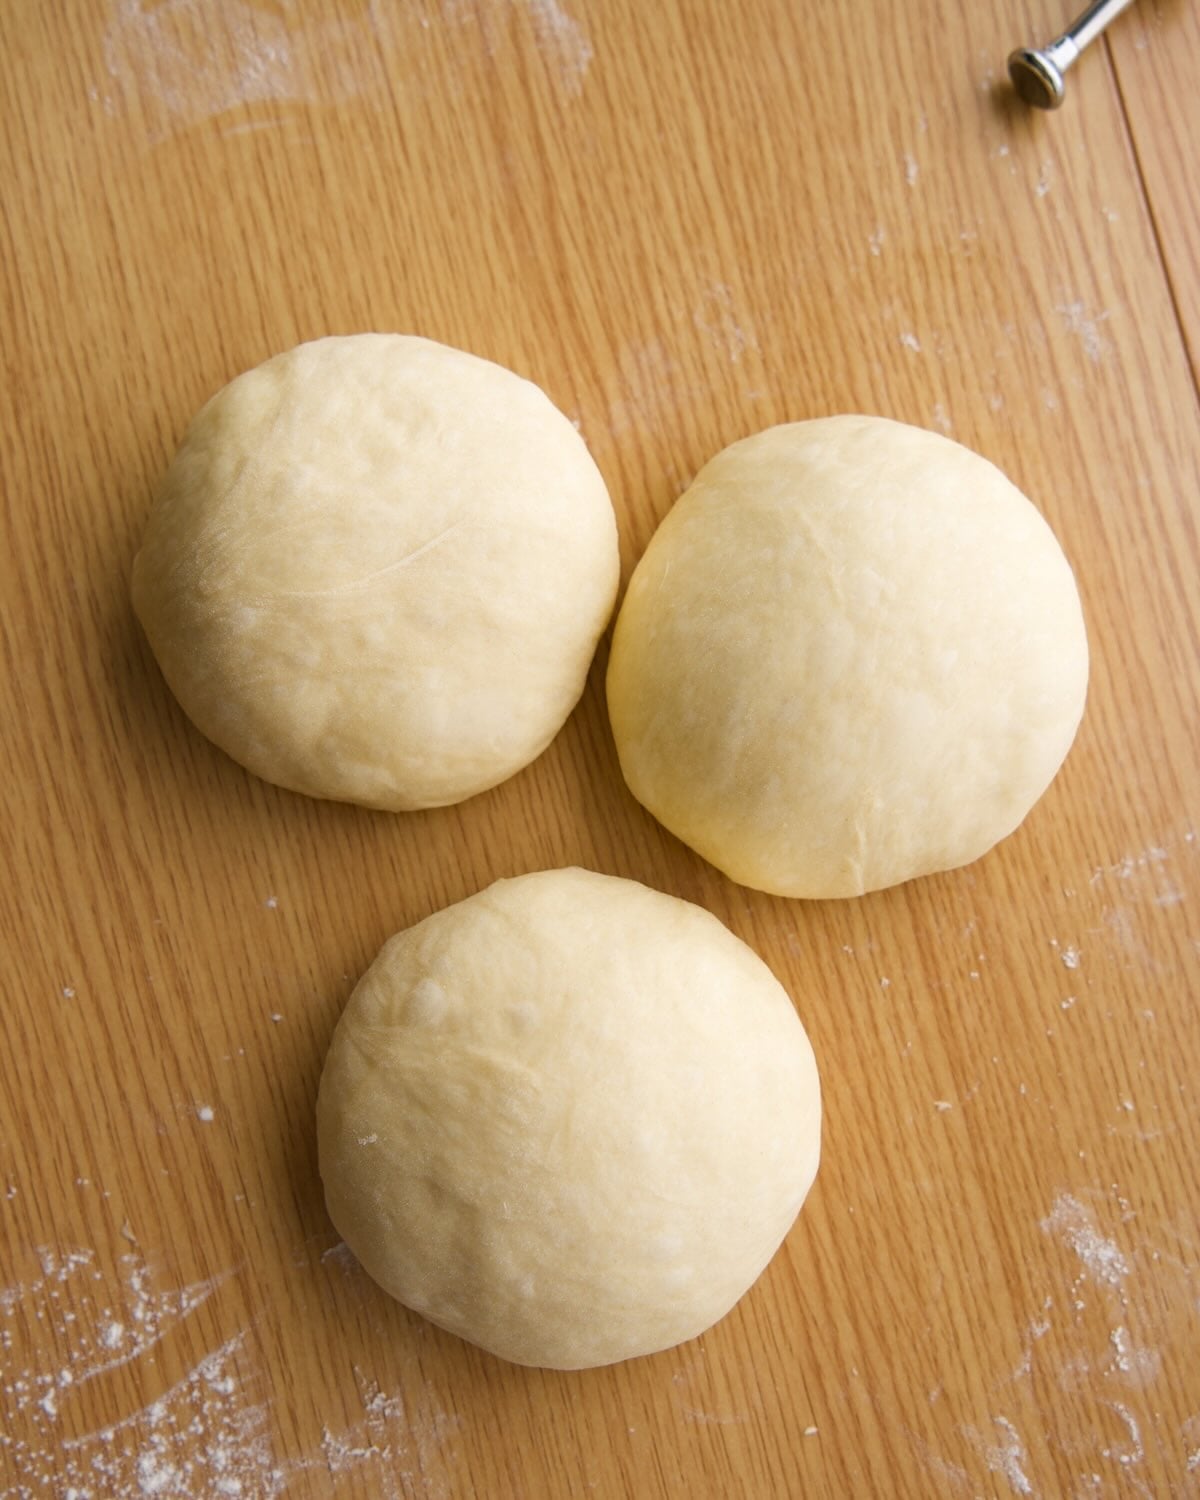
- Gently preshape each piece into a ball, then cover and rest for 20–30 minutes.
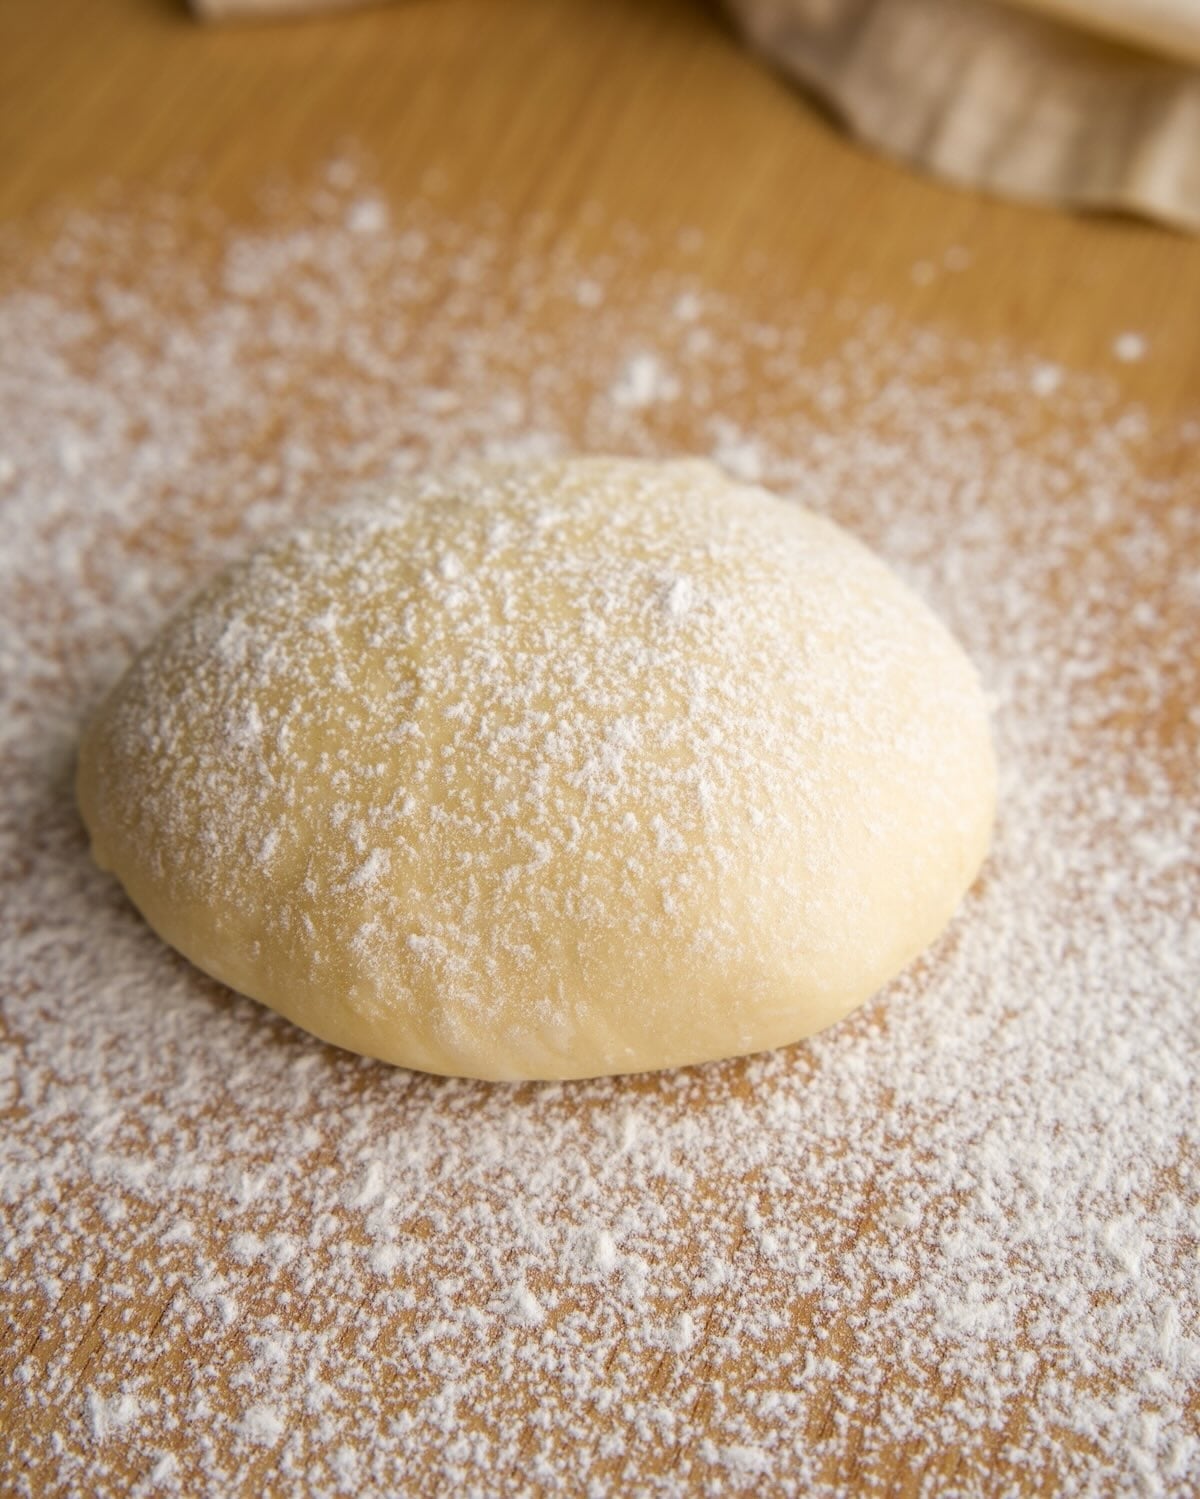
- Place the preshaped dough on a lightly floured surface and dust the top lightly with flour.
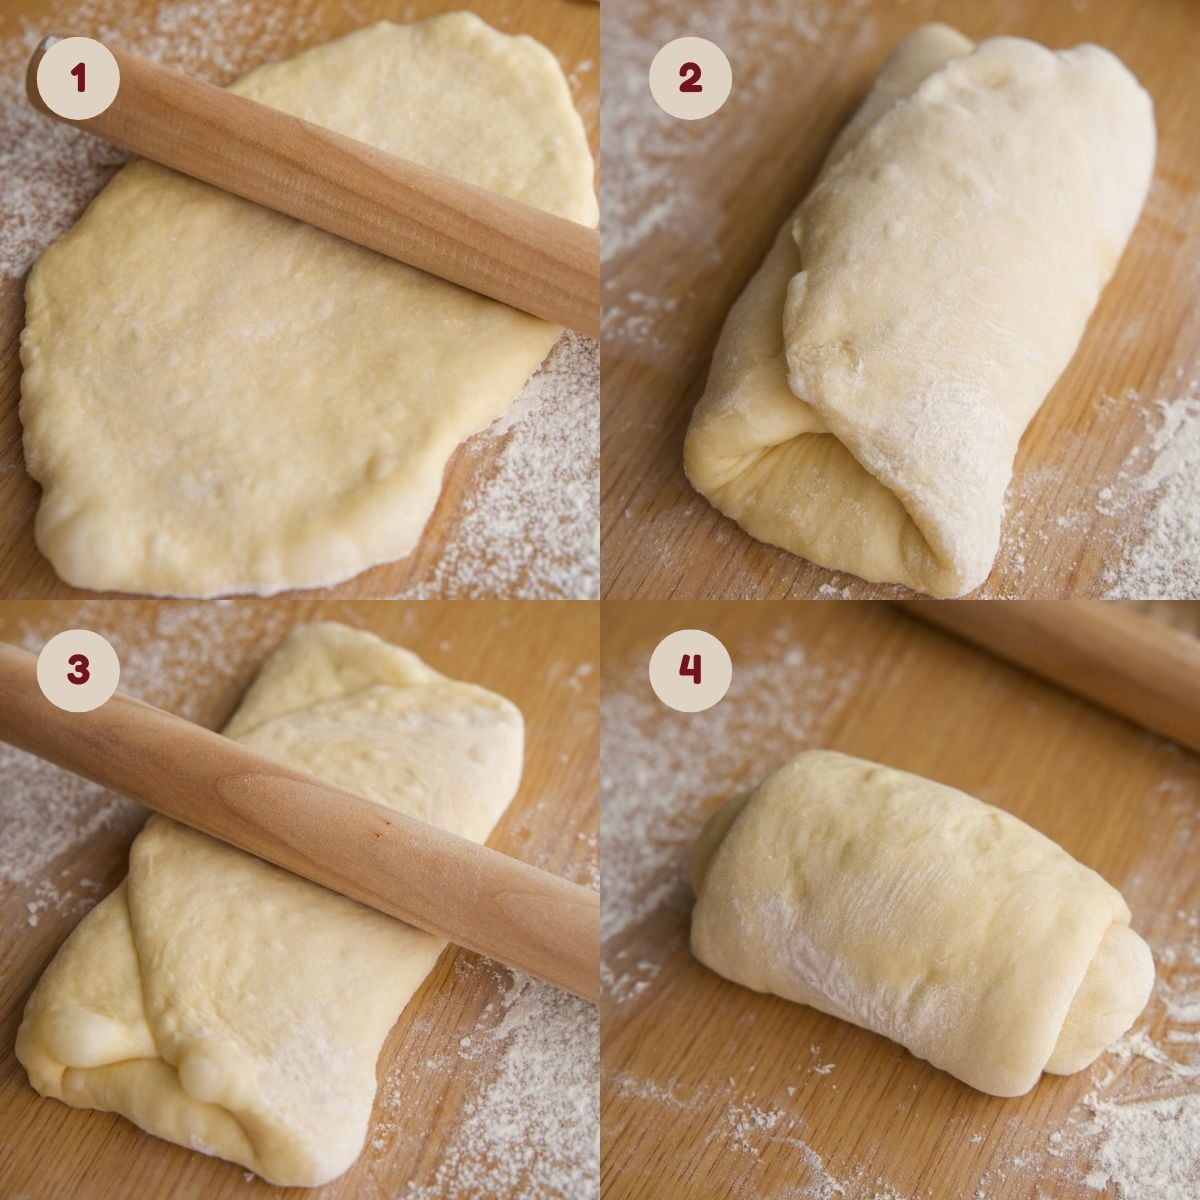
- Roll the dough out to about ⅓ inch thick. Fold the top and bottom edges toward the center to form a rectangle, then gently flatten to roughly ½ inch. Finally, roll the dough into a log and pinch the seam to seal.
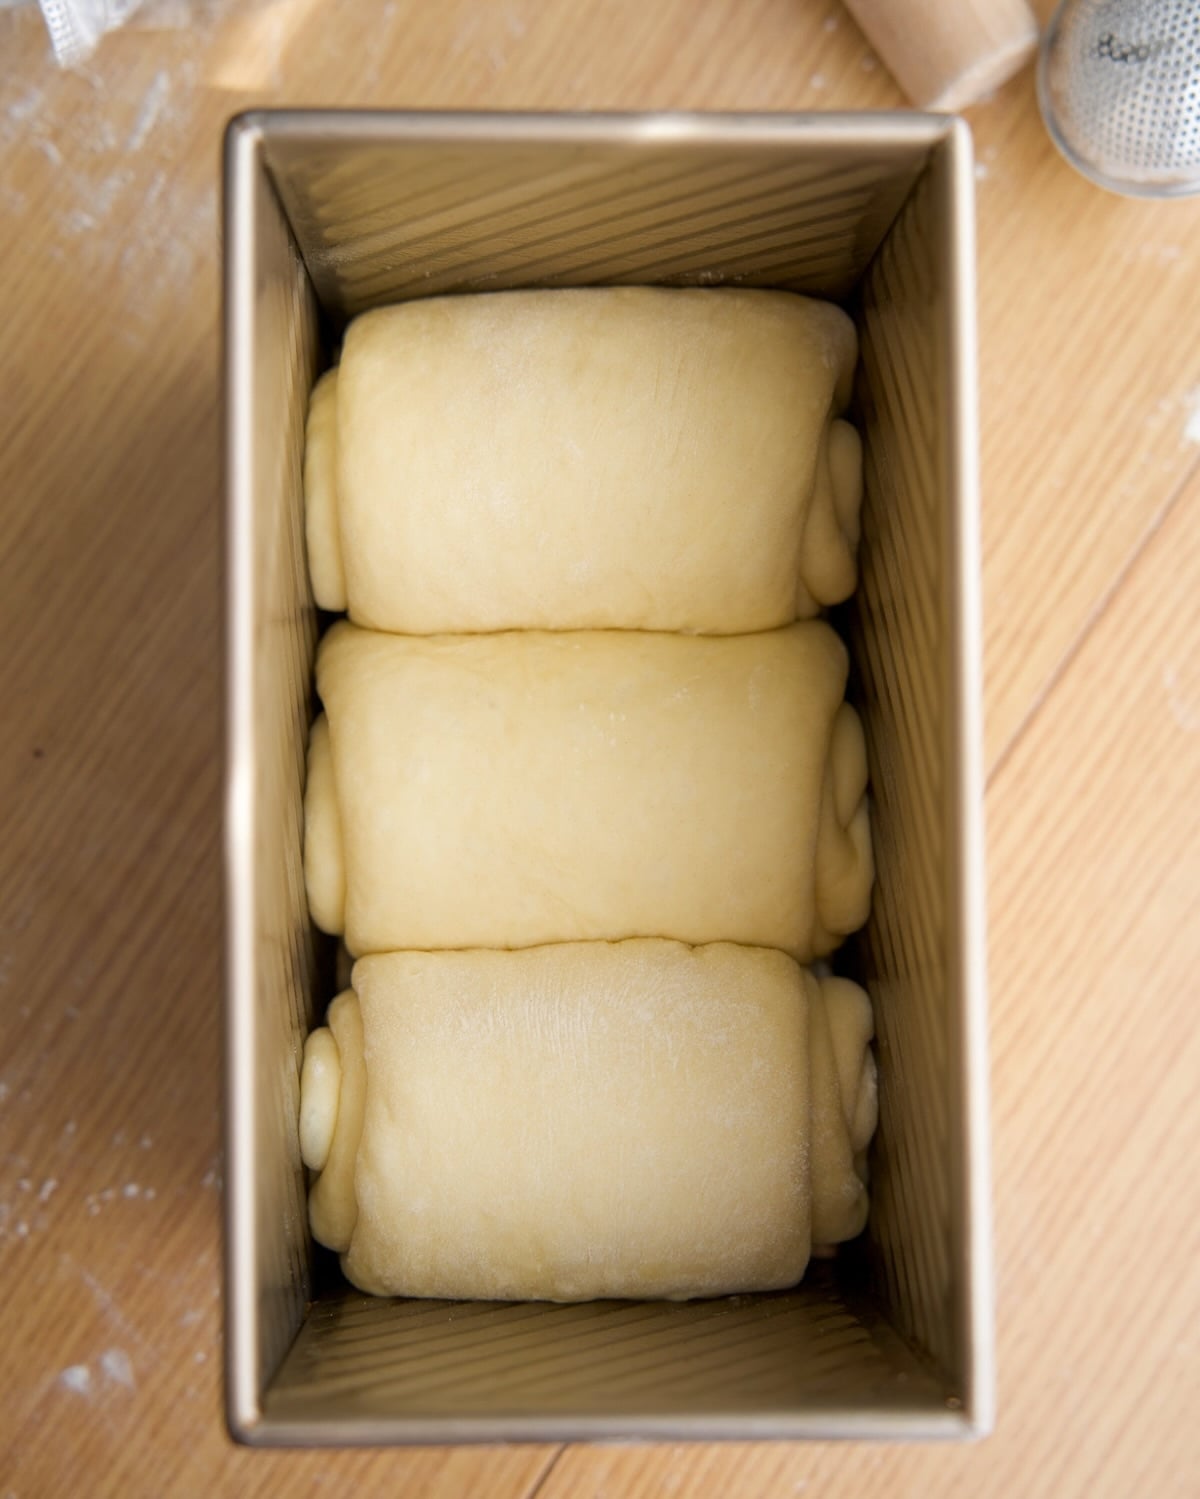
- Place the rolls in a well-greased 1 lb pullman loaf pan.
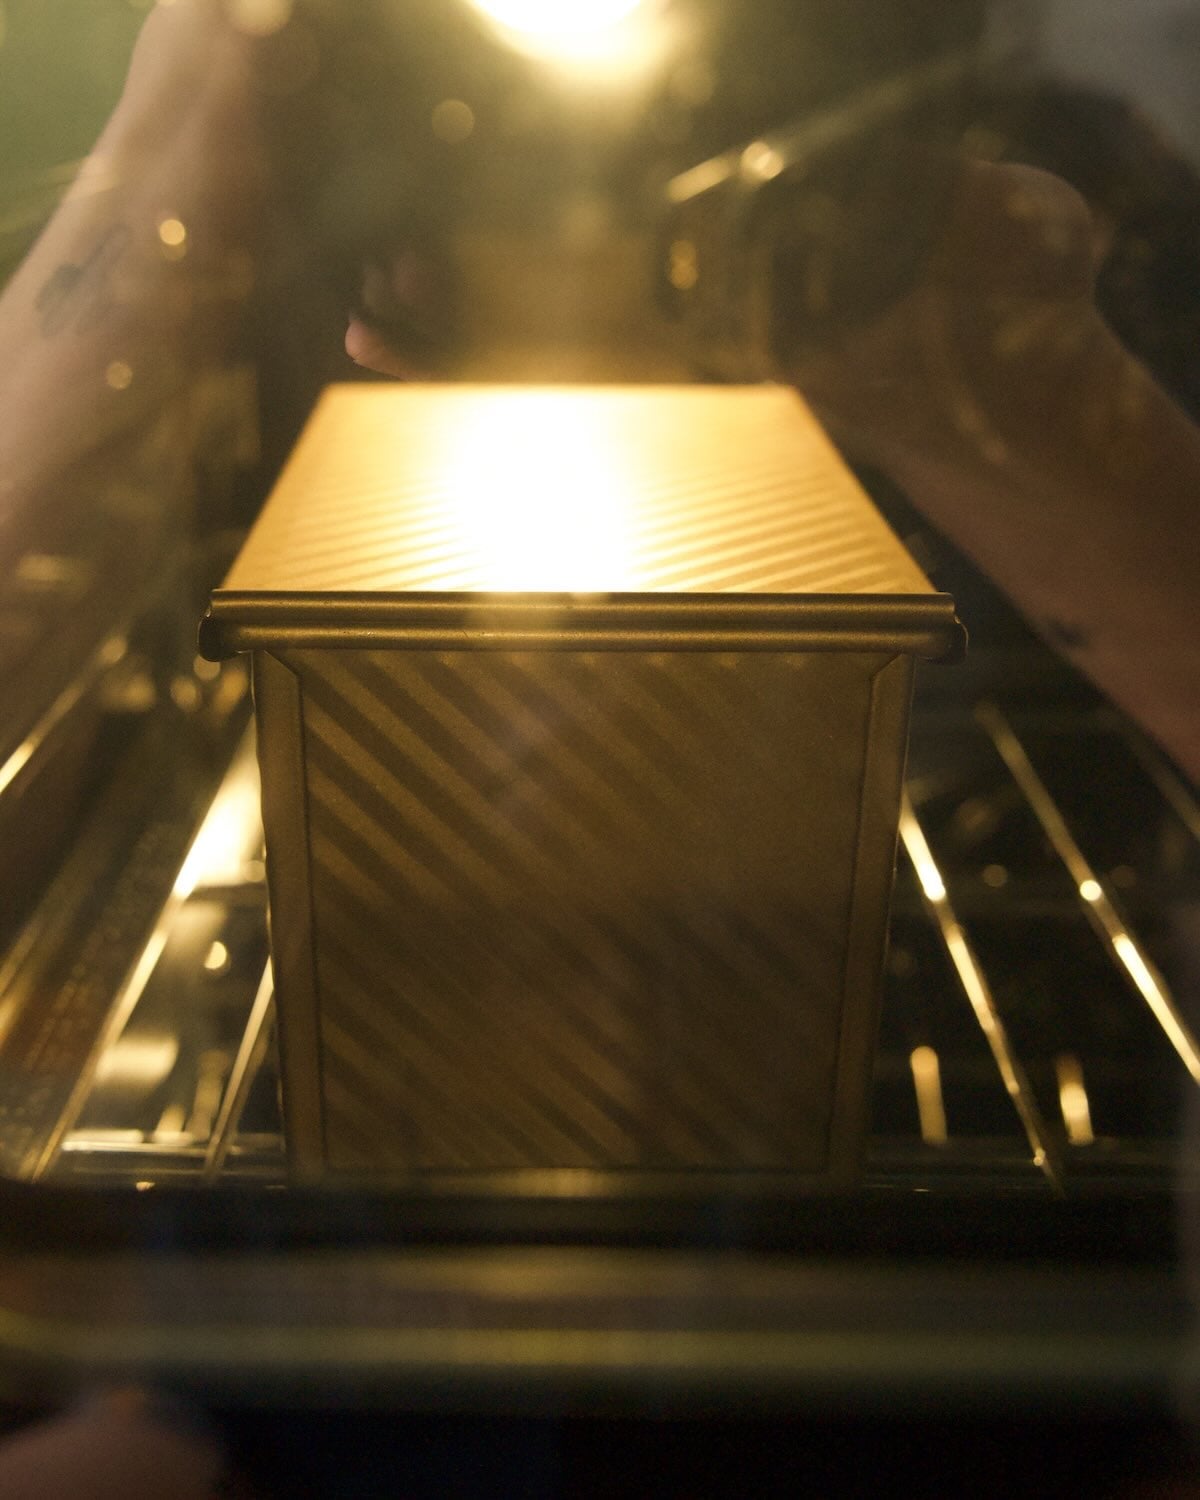
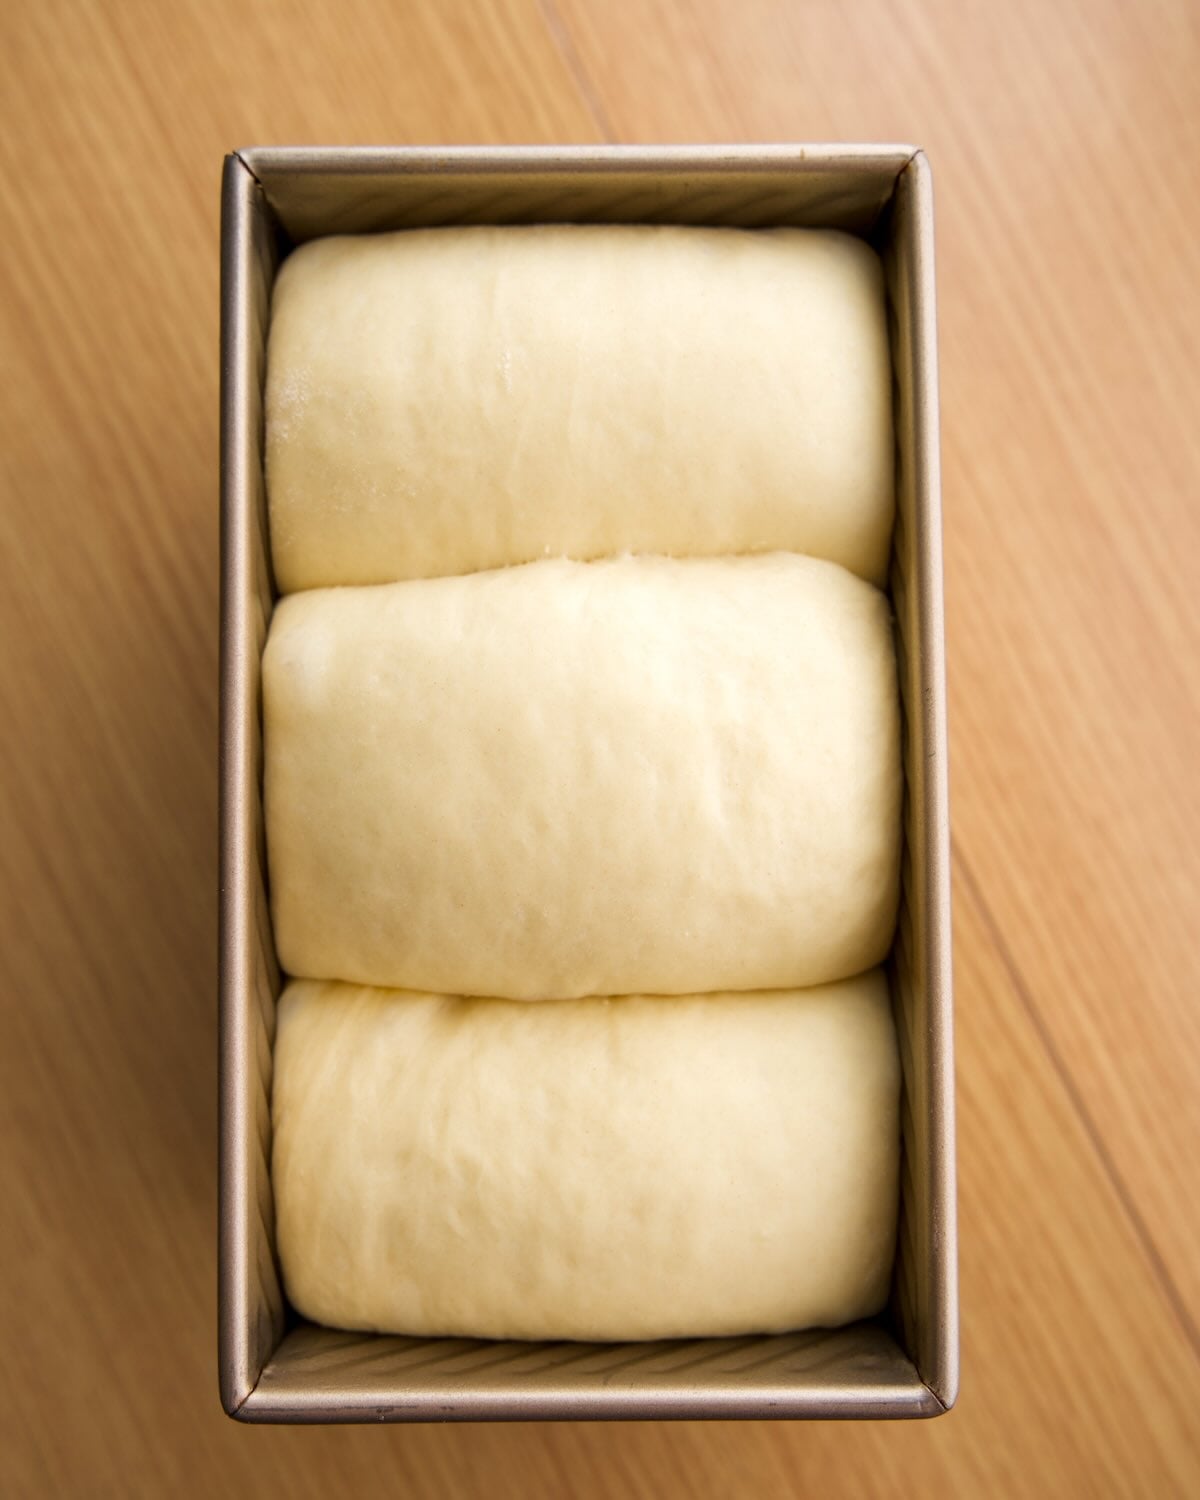
- Cover the rolls and proof in a warm spot until the dough nearly reaches the top of the pan (about 1½ to 2 hours). About 15 minutes before baking, preheat your oven to 350 °F (175 °C).
- Lightly brush the tops of the dough with milk.
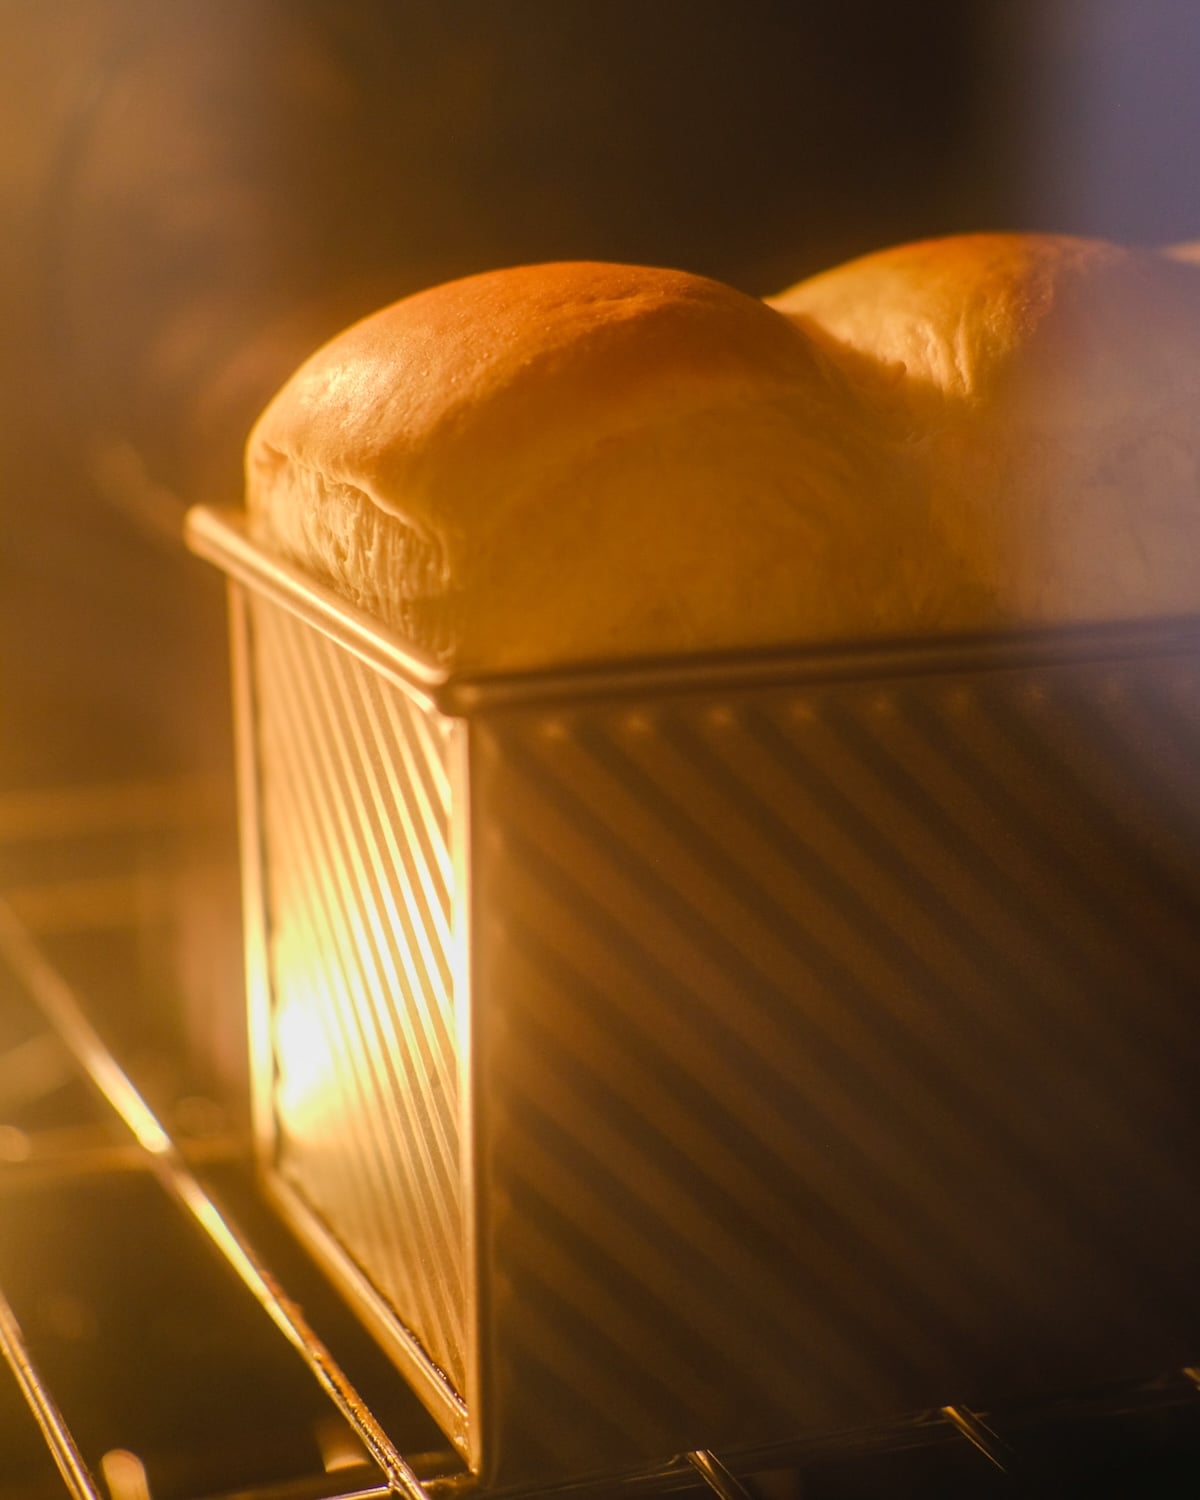
- Bake for 28-30 minutes.
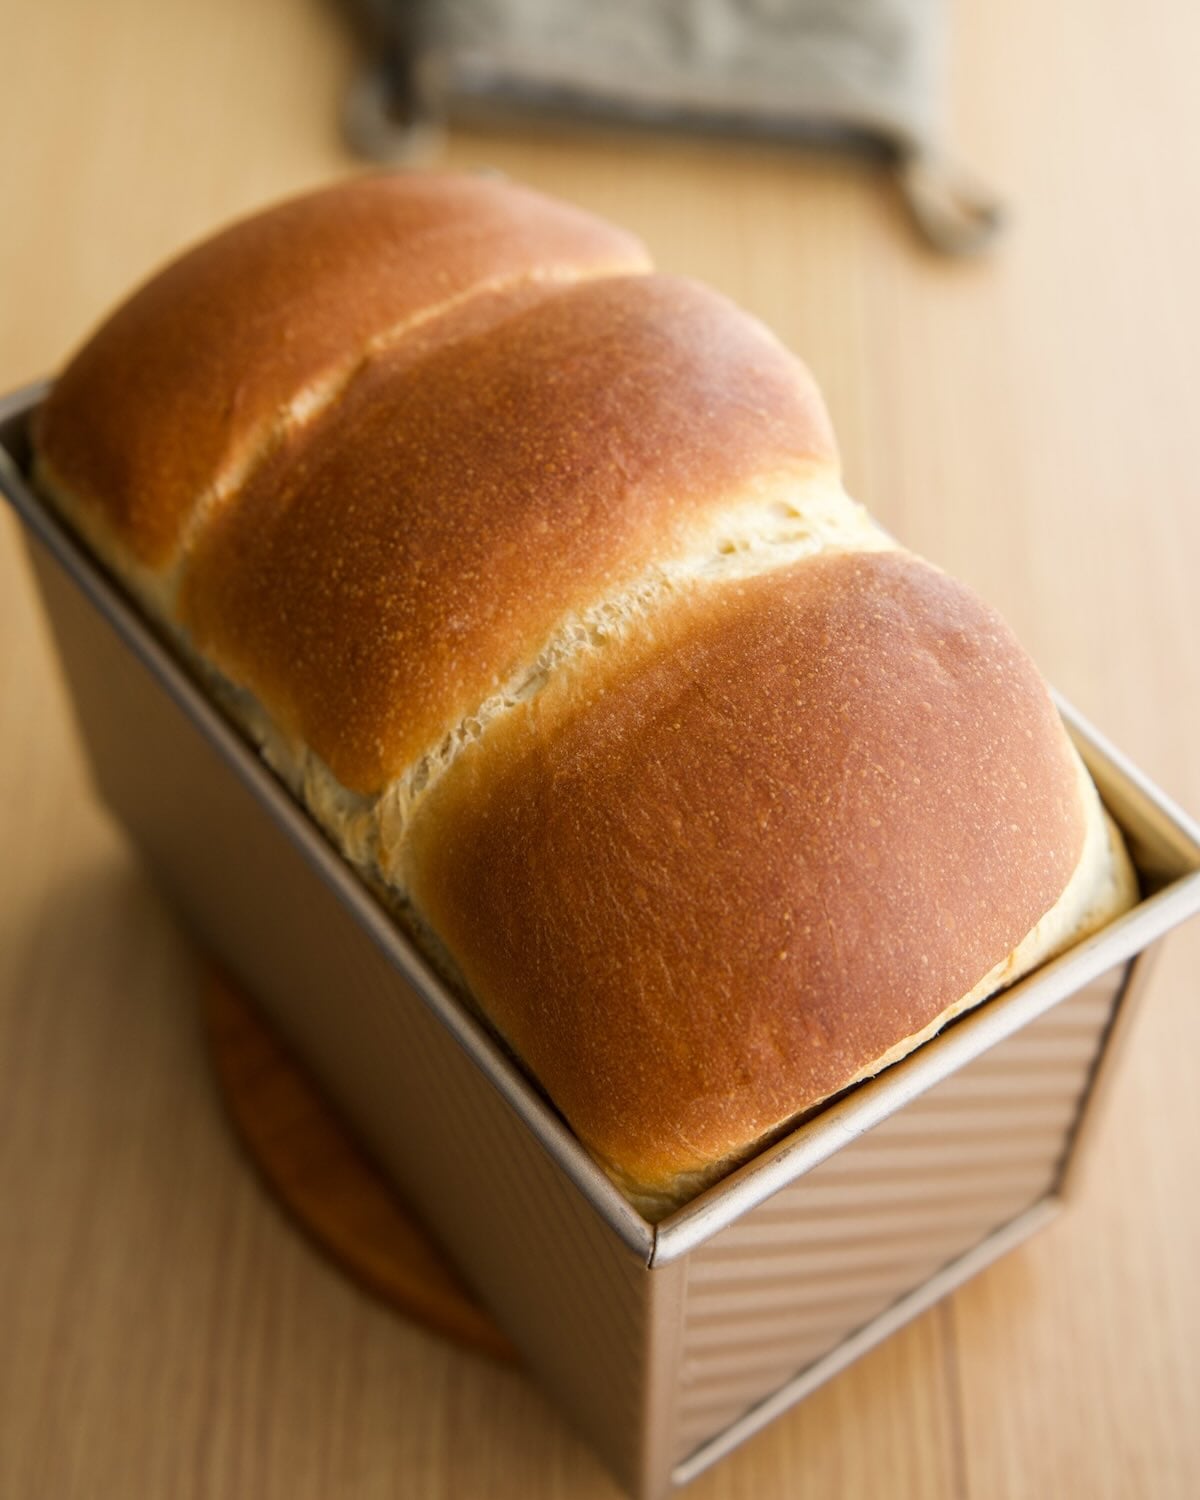
- Let the bread cool in the loaf pan for 10 minutes so the sides set and release easily.

- Remove and let it cool completely on a wire rack before cutting, so the crumb sets properly.
Recipe Tips
Adjust your starter to your schedule – You can refrigerate your sweet stiff starter at around 75% rise to better fit your baking schedule. I’ve done this with great results.
Bring ingredients to room temperature – Take the milk, egg, and butter out of the fridge ahead of time.
Use the tangzhong to balance temperature – If your milk or egg are still a bit cold, you can use the tangzhong while it’s still warm to help bring the dough to a better temperature for fermentation. Just make sure it’s not piping hot, or it could affect the starter.
Let the loaf rest before removing – After baking, let the bread sit in the pan for about 10 minutes so the sides can set and release more easily. If needed, gently loosen the edges with a silicone bench scraper.
Create the right environment for your dough – If your kitchen runs cold and you don’t have a bread proofer, place your dough in a slightly warm spot like an oven with the light on, near a warm appliance, or next to a cup of hot water in a closed microwave. I’ve provided a temperature and timing guide below to help you.

Storing
Enriched bread tastes best fresh, but stores well:
- Room temperature: Store the cooled loaf tightly in a large ziplock bag, paper bread bag, or in an airtight container. It will stay soft for 2–3 days.
- Refrigeration: Recommended if you still have bread left over after 2-3 days. It will extend the shelf life for another 3-4 days, but note that it will dry out a bit and may become stale.
Pro tip: Keeping the loaf whole helps to retain moisture, so only slice what you need if you want to extend the shelf life.
Serving Suggestions
Milk bread is versatile and delicious in so many ways. Toasted with butter and homemade strawberry jam is my favorite! It’s simple and perfect for breakfast or a late night snack.
It’s also ideal for sandwiches, from a classic PB&J to savory fillings like eggs, cheese, or ham. If you love Korean street food innovations, try it in my Korean Street Toast recipe!
Here are some other ideas:
- French toast – the soft, pillowy texture soaks up the custard beautifully. Pro tip: wait until it gets stale so it holds up better.
- Bread pudding – its tender crumb makes for a rich, comforting dessert. This is also a great way to use up stale milk bread.
- Mini sliders or dinner rolls – shape smaller buns for dinner rolls or sliders.
Frequently Asked Questions
I developed this recipe using a stiff starter, since that’s how I maintain mine, but you can absolutely use a 100% hydration starter. The difference in overall hydration is minimal, and it should perform the same as long as your liquid starter has had regular, healthy feedings.
Compared to sourdough country loaf recipes, this enriched dough may seem slow to rise. Butter, milk, and sugar all slow fermentation, so be patient. Keep the dough warm, and make sure your starter is active and at its peak when used. If the dough isn’t rising at all, it could be a starter health issue.
No. When made with a sweet stiff starter and proper temperature control, the bread should be soft, slightly sweet, and not sour at all.
You can, but the bread won’t be as soft or moist. Tangzhong is key for that signature fluffy, tender texture.
Milk bread dough is naturally soft and slightly sticky because of the milk, butter, and sugar. However, if it feels overly sticky and hard to handle, it may not have been mixed long enough. As you continue kneading, the gluten develops and the dough will become smoother, more elastic, and easier to work with. Try to avoid dusting too much extra flour to handle it, as this can make the bread dense. Instead, lightly wet your hands and work surface to help with handling.
I use Costco organic all-purpose flour (11.5% protein), which is slightly stronger than most AP flours. For best results, you can substitute bread flour, or any other high-protein all-purpose flour. Lower-protein AP will still work, but the dough may be softer and slightly less structured.
Yes! You can absolutely make this dough by hand, it just takes a bit more time and patience. Since milk bread is an enriched dough, it will start out sticky, but as you knead, it will become smoother and more elastic. Use the slap-and-fold technique, and give the dough short rests if needed. It may take about 15–20 minutes of kneading to reach proper gluten development.
Try these next
If you tried this Sourdough Milk Bread recipe or any other recipe on my website, please leave a 🌟 star rating and let me know how it went in the comments below!
Soft & Fluffy Sourdough Milk Bread
Ingredients
Sweet Stiff Starter
- 15 g ripe starter
- 15 g sugar
- 80 g strong all-purpose flour, or bread flour
- 40 g warm water
Tangzhong (roux)
- 25 g strong all-purpose flour, or bread flour
- 120 g milk
Final Dough
- all of the sweet stiff starter
- all of the tangzhong
- 300 g strong all-purpose flour, or bread flour
- 125 g milk, 2% or whole, room temperature
- 30 g softened butter
- 30 g sugar
- 1 tsp kosher salt, Diamond Crystal
- 1 egg, room temperature
- 10 g milk powder, optional
Instructions
Make the sweet stiff starter
- Combine 15 g ripe starter, 80 g flour, 15 g sugar, and 40 g warm water in a small bowl. Knead for 2–3 minutes until fully mixed.
- Cover and ferment until it peaks, around 6 hours. The starter is ready to use when domed, airy, and has at least doubled in size. *Keep the starter warm – Maintain the sweet stiff starter at 78–85°F (26–29°C) to encourage yeast activity and keep acidity low.
Make the tangzhong
- In a small saucepan over medium-low heat, whisk together 120 g milk and 25 g flour until it thickens into a smooth, custard-like paste. Set aside to cool slightly.
Combine ingredients for final dough:
- In a stand mixer bowl fitted with the dough hook, combine: flour, sweet stiff starter, tangzhong, egg, sugar, softened butter, salt, milk, and optional milk powder. *Pro tip: If your milk or egg are still a bit cold, you can use the tangzhong while it’s still warm to help bring the dough to a warmer temperature for fermentation. Just make sure it’s not piping hot, or it could affect the starter.
- Mix on low (“stir”) speed for 1–2 minutes until just combined. Scrape down the sides.
- Increase to speed 4 (medium) for 4 minutes to help develop gluten.
- Reduce to speed 2 and knead for 6–8 minutes, or until the dough forms a smooth ball on the hook and pulls away from the sides of the bowl.
- Turn the dough onto a lightly wet surface. Perform a few slap-and-folds and shape into a smooth, taut ball.
- Place the dough in a lightly greased bowl and cover. Ferment until doubled in size, typically 3½–6 hours depending on starter strength and environment. Refer to my temperature & timing chart for guidance.Moderate environment (75–78 °F / 24–26 °C): allows steady, controlled fermentation.Advanced option: If you’re confident reading your dough, warmer conditions (up to ~83 °F / 28 °C) will work. This is how I do it, usually taking 3½–4 hours. Just watch closely to avoid overproofing.
Divide & pre shape
- Turn the dough onto a lightly floured surface and divide into 2 or 3 equal pieces.
- Preshape each piece into a ball, cover, and rest for 20–30 minutes.
Final shape
- Lightly flour your work surface and the tops of the dough balls. Roll each piece to about ⅓ inch thick, then fold the top and bottom edges toward the center to form a rectangle. Gently flatten to about ½ inch, then roll into a log and pinch the seam to seal (see photo collage above for reference)
- Place each piece in a well-greased 1‑lb Pullman loaf pan, rolling or tucking edges to fit neatly.
Final proof
- Cover and proof in a warm spot until the dough nearly reaches the top of the pan. Refer to my temperature & timing chart for guidance.
Bake
- Preheat the oven to 350 °F (175 °C) about 15 minutes before baking.
- Lightly brush the tops of the dough with milk, being careful not to let it drip down the sides, as the sugars can cause the loaf to stick to the pan.
- Bake for 28-30 minutes, until the crust is golden brown.
Rest and remove
- Let the bread cool in the pan for 10 minutes so the sides set and release easily. Remove the loaves and cool completely on a wire rack.Tip: If you’re having trouble removing the loaves cleanly, use a silicone bench scraper to gently loosen the sides so they release more easily.
Notes
Nutrition
Nutrition information is automatically calculated, so should only be used as an approximation.


Hi! Back again!
I think I got it!!! But question, my bread is kind of dense, like heavy. Is this normal?
Hi Christie! If your bread is dense, that is a sign of under fermentation. You may need to ferment longer- if your dough isn’t meeting the visual cues within the time & temperature chart, it could be a starter health issue.
Hi!!
I made this, and it was great! But my bread was soft, like softer than I think it should be. Almost gummy. What would you recommend, to prevent it from getting to hard and dry?
The top didn’t get golden crispy, just a light brown.
Hi Christie, it sounds like your loaf was possibly under proofed or not baked long enough. Try pushing bulk fermentation a little longer, especially if your dough hasn’t met the visual cues within the time/temperature guidelines 🙂
Finally!! Thanks for sharing this recipe! My loaf came out so soft like store bought. This recipe is also easy to make so really appreciate it for sharing! 🙂
Hi Mari, thanks for making it! I’m glad you liked it 🙂
I have been looking for a recipe like this! Thank you, I can’t wait to try it.
Have you experimented with mix-ins yet? Red bean and mochi or cinnamon raisins or even jalapeño and cheddar?
Hi Bee! I’m actually experimenting with inclusions now 🙂 Typically, these are added during final shaping after the second flattening stage. Right now I’m working on a black sesame swirl milk bread, and I hope to have a recipe posted soon!